Simple Step : Implementing ADDS Sites and Replication in Windows Server 2012 R2
In my post this time, lets go through a simple step on how you as a Server Admin can implementing ADDS Sites and Replication in Windows Server 2012 R2.
In ADDS infrastructure, standard domain controllers replicate AD Directory information by using a multimaster replication model.
This means that if a change is made on one domain controller, that change then replicates to all other domain controllers in the domain, and potentially to all domain controllers throughout the entire forest.
More information, please log in to : http://technet.microsoft.com/en-us/library/cc775549%28v=ws.10%29.aspx
For this demo, i will assume that we have this kind of scenario so that with this demo, you can understand whats going on within the steps.
“Your organization has deployed a single ADDS domain, with all the domain controllers located in the JakartaHQ data center.
As the organization has grown and added branch offices with large numbers of users, it has become apparent that the current ADDS environment does not meet the company requirements.
Users in some branch offices report that it can take a long time for them to sign in on their computers.
Access to network resources such as the company’s Microsoft Exchange 2013 servers can be slow, and they fail sporadically.
As one of the senior network administrators, you are responsible for planning and implementing an ADDS infrastructure that will help address the business requirements for the organization.
You are responsible for configuring AD DS sites and replication to optimize the user experience and network utilization within the organization.”
What i have for this demo :
1 – 1 Domain Server (DC1)
2 – 1 Member Server (this server will be upgraded to Domain Controller)
1st – Install domain controller in member server
2nd – Rename the default site
1- Log in to DC01 domain server and open Active Directory Sites and Services…
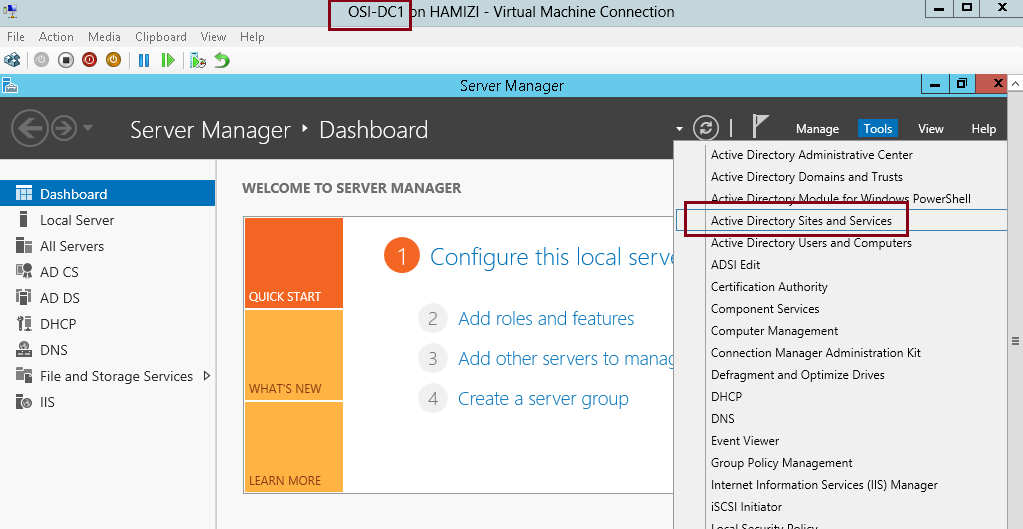
2 – Next, In Active Directory Sites and Services console, right-click Default-First-Site-Name, and then click Rename…
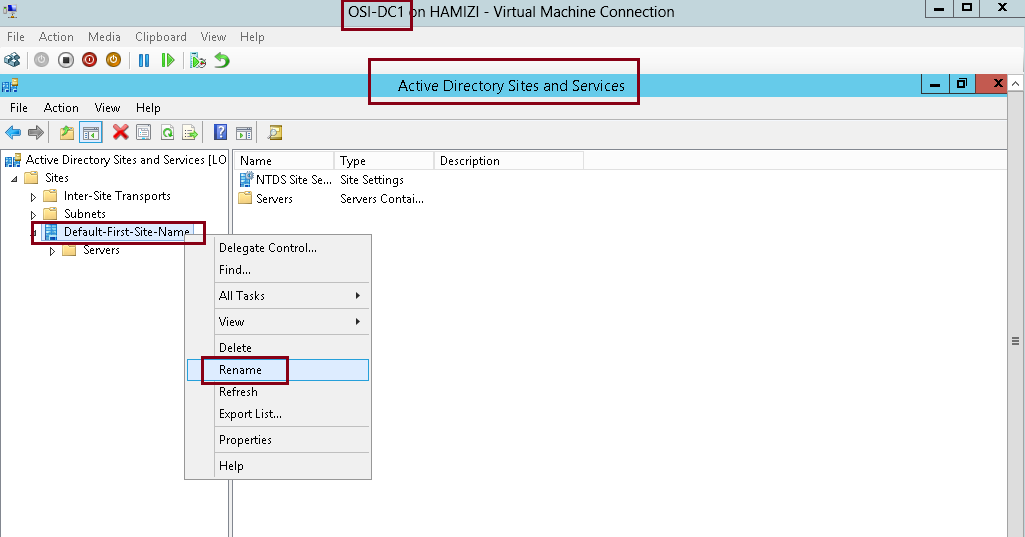
3 – I rename the Default-First-Site-Name to JakartaHQ, and then verify that both LON-DC1 and TOR-DC1
belong to the JakartaHQ site.

3rd – Configure IP subnets associated with the default site
1 – to Configure IP subnets, right-click Subnets, and then click New Subnet…

2 – In the New Object – Subnet dialog box, under Prefix, type 172.16.0.0/24, then click JakartaHQ, and then click OK…

4th – Create the AD DS sites
1 – In the Active Directory Sites and Services console, right-click Sites, and then click New Site…

2 – In the New Object – Site dialog box, type Toronto then click DEFAULTIPSITELINK, and then click OK…
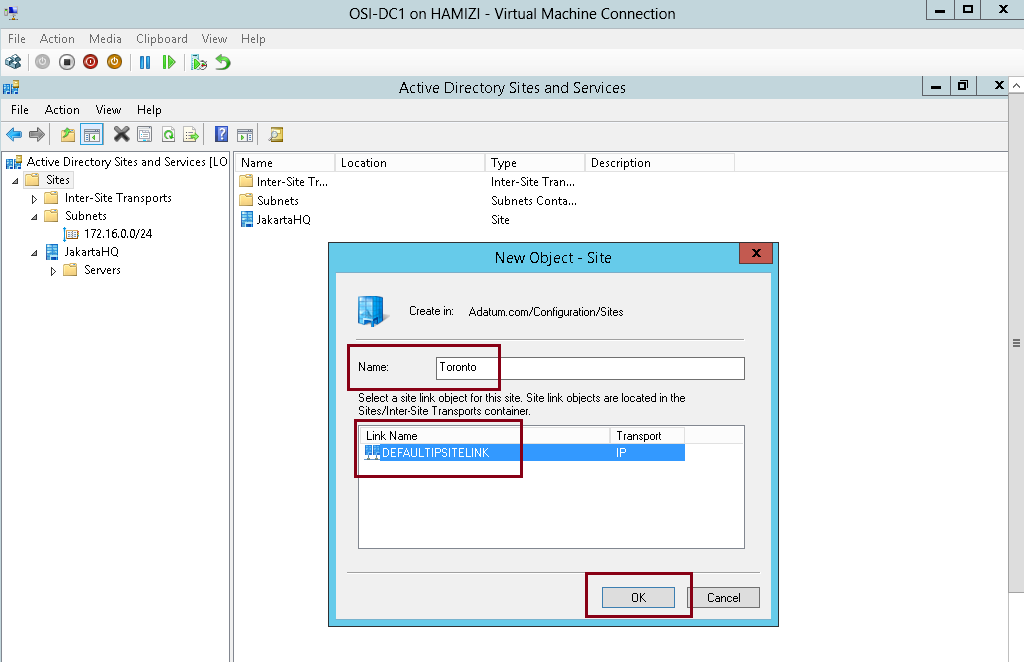
3 – click OK…

4 – repeat the previous step, but this time give a name as My-Test-Site…

5th – Create IP subnets associated with the Toronto sites
1 – In the Active Directory Sites and Services console, right-click Subnets, and then click New Subnet…

2 – In the New Object – Subnet dialog box, under Prefix, type 172.16.1.0/24, click Toronto, and then click OK…

3 – Right-click Subnets again, and then click New Subnet, under Prefix, type 172.16.100.0/24, then Under Select a site object for this prefix, click My-Test-Site, and then click OK…

4 – Verify in the details pane that the two subnets are created and associated with their appropriate site…

6th – Configure site-links between ADDS sites
1 – In the Active Directory Sites and Services console, right-click IP, and then click New Site Link…

2 – In the New Object – Site Link box, type Toronto-Test-Site, then click Toronto and My-Test-Site, click Add…
3 – Then click OK…

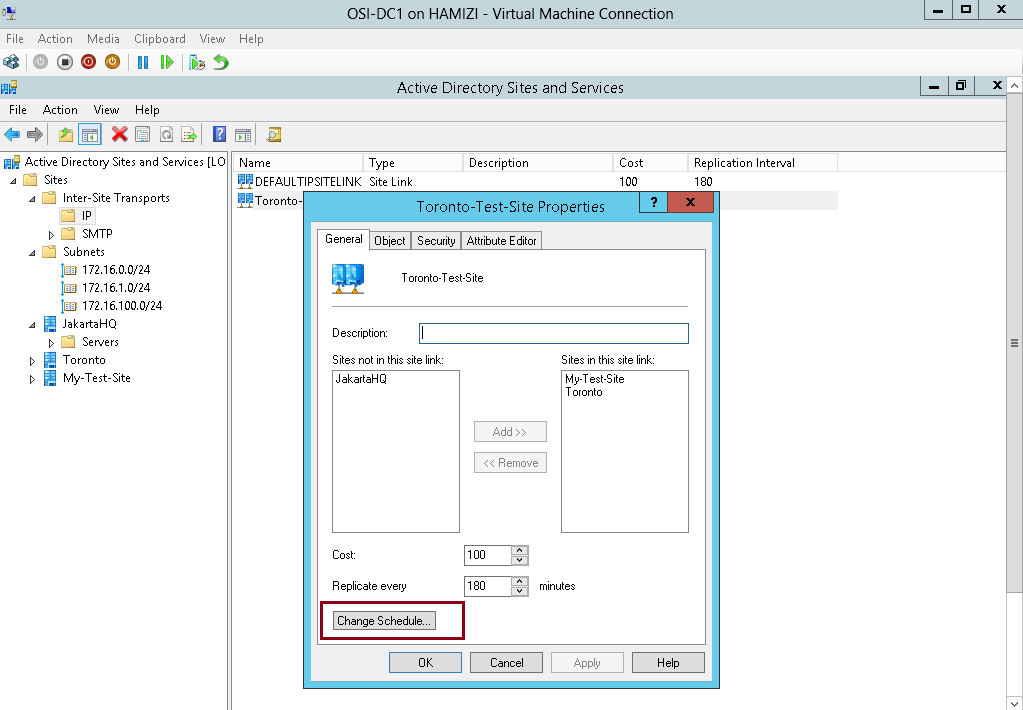
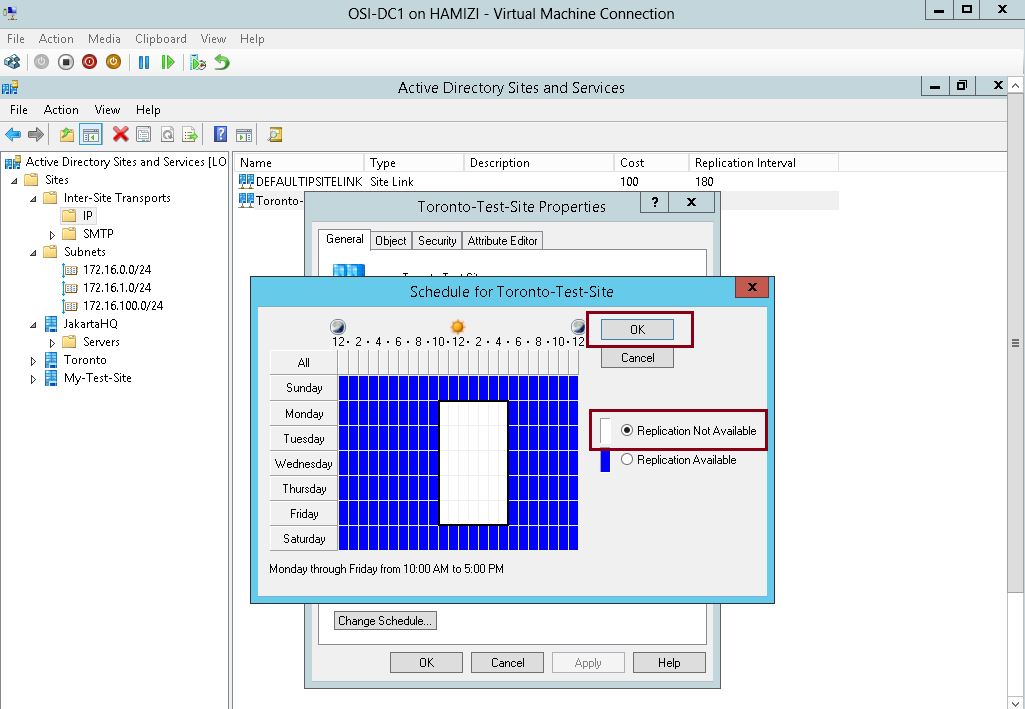
4 – Right-click Toronto-Test-Site, and then click Properties…

5 – then click Change Schedule…
6 – In the Schedule for Toronto-Test-Site box, highlight any range you prefer and then click Replication Not Available, and click OK…
7 – Next rename the DEFAULTIPSITELINK to LON-TOR…

8 – Next right-click LON-TOR, and then click Properties…

9 – Under Sites in this site link, click My-Test-Site, and then click Remove…

10 – Next to Replicate Every, change the value to 30 minutes, and then click OK…

7th – Move 2nd DC to the Toronto site
1 – In Active Directory Sites and Services console, right-click TOR-DC1, and then click Move…
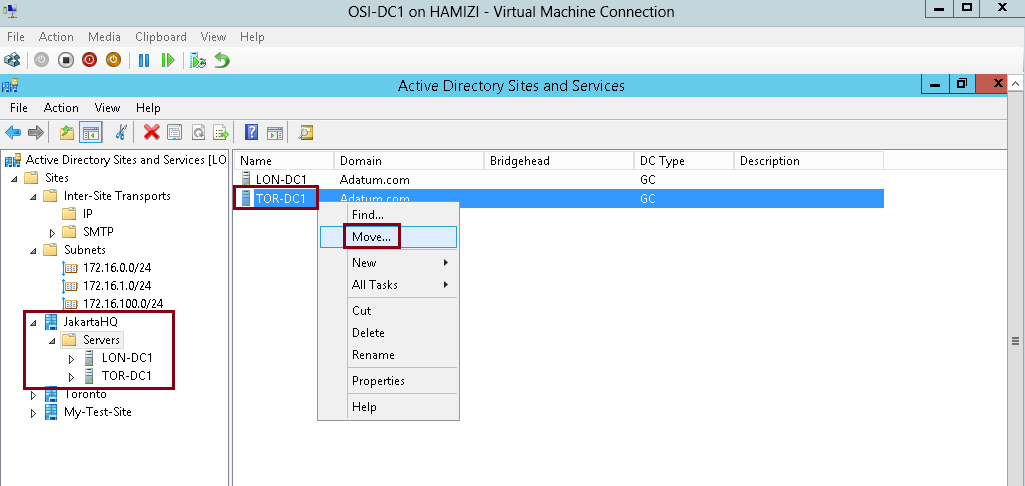
2 – In the Move Server box, click Toronto, and then click OK…

3 – Verify the TOR-DC1 listed under Toronto site…

8th – Monitor ADDS site replication
1 – On the DC01, open Windows PowerShell and then type Repadmin /kcc
** This command recalculates the inbound replication topology for the server.
** Knowledge Consistency Checker (KCC) helps generate and optimize the replication automatically between domain controllers within a site.
** type Repadmin /showrepl
— To display the replication connections of a domain controller and make sure you verify that the last replication with TOR-DC1 was successful…

2 – Next, type Repadmin /bridgeheads
** This command displays the bridgehead servers for the site topology…
then type : Repadmin /replsummary
** This command displays a summary of replication tasks. Verify that no errors appear…

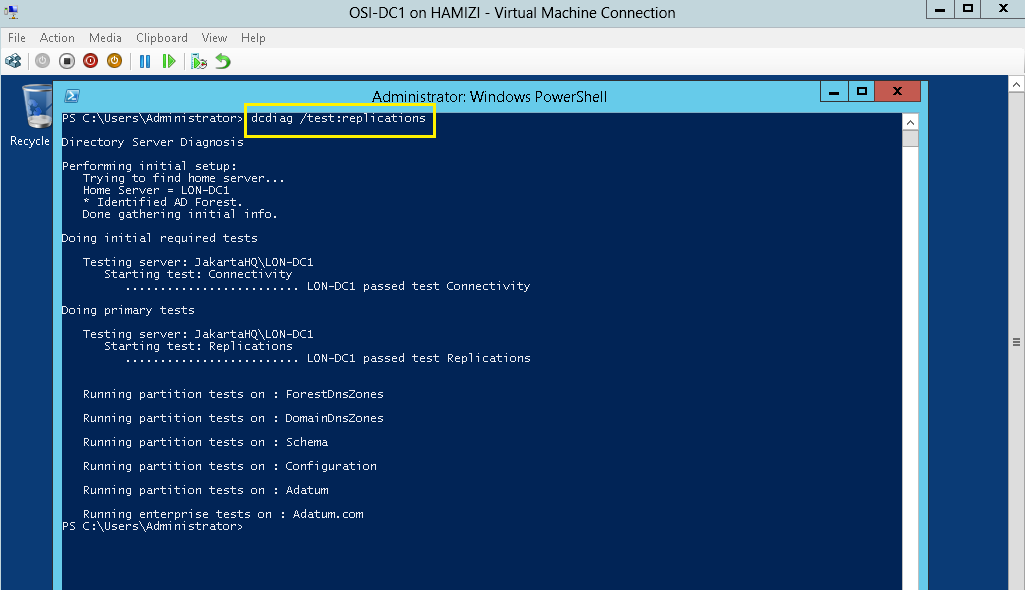
3 – Next, type DCDiag /test:replications
** Verify that all connectivity and replication tests pass successfully…
4 – Switch to the other Domain controller , and then repeat the same steps and that the last replication with LON-DC1 was successful.
That’s all for now… and you have succesfully configured site-links and monitored replication….