Step by Step : Deploy & Configure BranchCache in Windows Server 2012 R2
Branch offices have unique management challenges.
A branch office typically has slow connectivity to the enterprise network and limited infrastructure for securing servers.
In addition, you need to back up data that you maintain in your remote branch offices, which is why organizations prefer to centralize data where possible.
Therefore, the challenge is to provide efficient access to network resources for users in branch offices.
BranchCache helps you overcome these problems by caching files so they do not have to be transferred repeatedly over the network.
BranchCache improves the responsiveness of common network applications that access intranet servers
across slow WAN links.
Because BranchCache does not require additional infrastructure, you can improve the performance of remote networks by deploying Windows 7 or newer client computers, and by deploying Windows Server 2008 R2 or newer servers, and then enabling the BranchCache feature.
BranchCache maintains file and folder permissions to ensure that users only have access to files and
folders for which they have permission.
For more information, please log in to : http://technet.microsoft.com/en-us/library/hh831696.aspx
For this demo, i will be using 2 Server & 1 client PC, which is 1 Domain Server, 1 Member Server and 1 Windows 8 PC…
1st – Configure Domain Server to use Windows BranchCache
1 – On the DC01 server, open Server Manager, click Add roles and features and proceed installation until you reach Select server roles interface, and click BranchCache for Network Files, then proceed with Next…

2 – On the Select features interface, click Next…

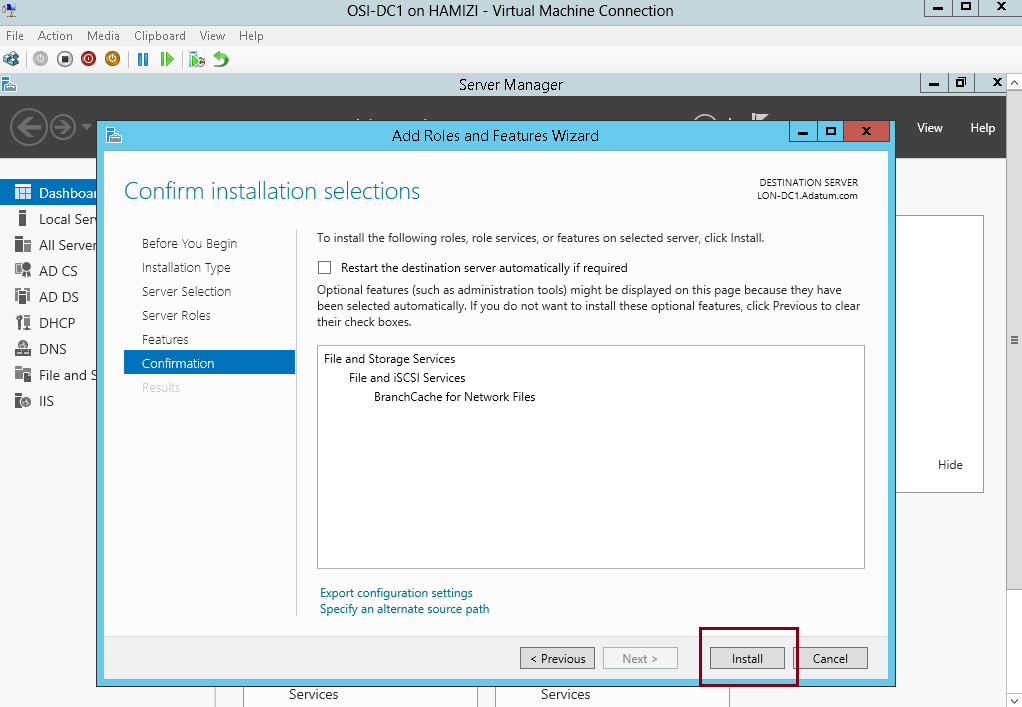
3 – On the Confirm installation selections interface, click Install…
4 – Once the installation complete, click Close…

5 – Next, on the Domain Server open Gpedit.msc…
** In the Local Group Policy Editor console, under Computer Configuration, expand Administrative Templates, expand Network, and then click Lanman Server.
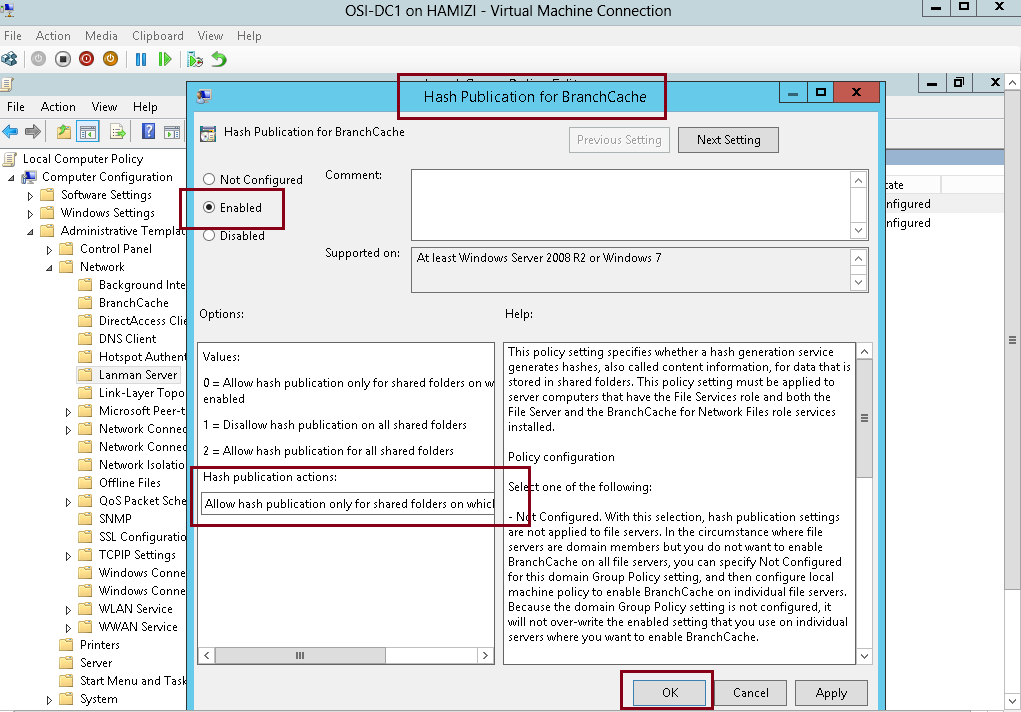
** On the Lanman Server result pane, double click Hash Publication for BranchCache…

6 – In the Hash Publication for BranchCache box, click Enabled, in the Hash publication actions list, select the Allow hash publication only for shared folders on which BranchCache is enabled, and then click OK…
2nd – Simulate a slow link to the branch office
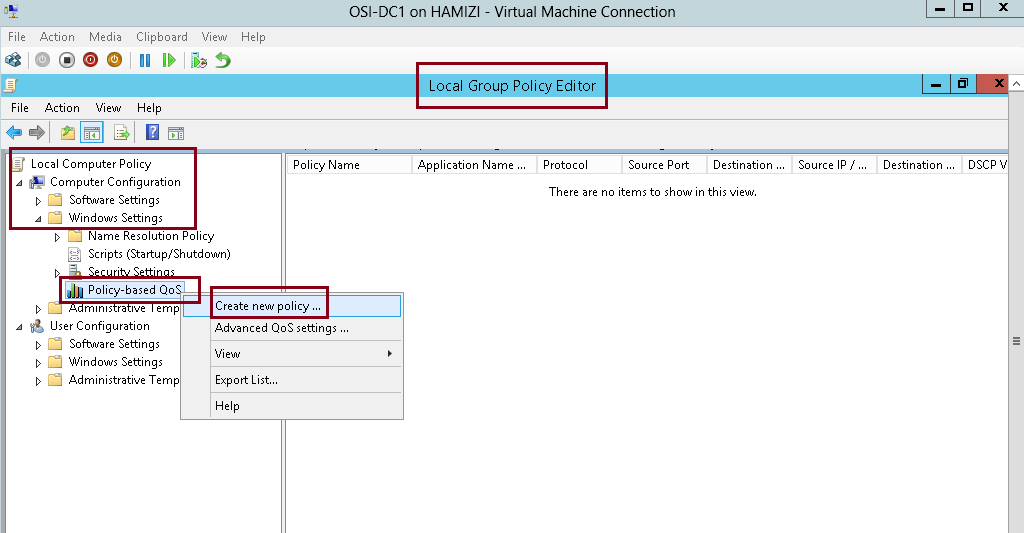
1 – Still in the Local Group Policy Editor console in Domain Server, in the navigation pane, under Computer Configuration, expand Windows Settings, right-click Policy-based QoS, and then click Create new policy…
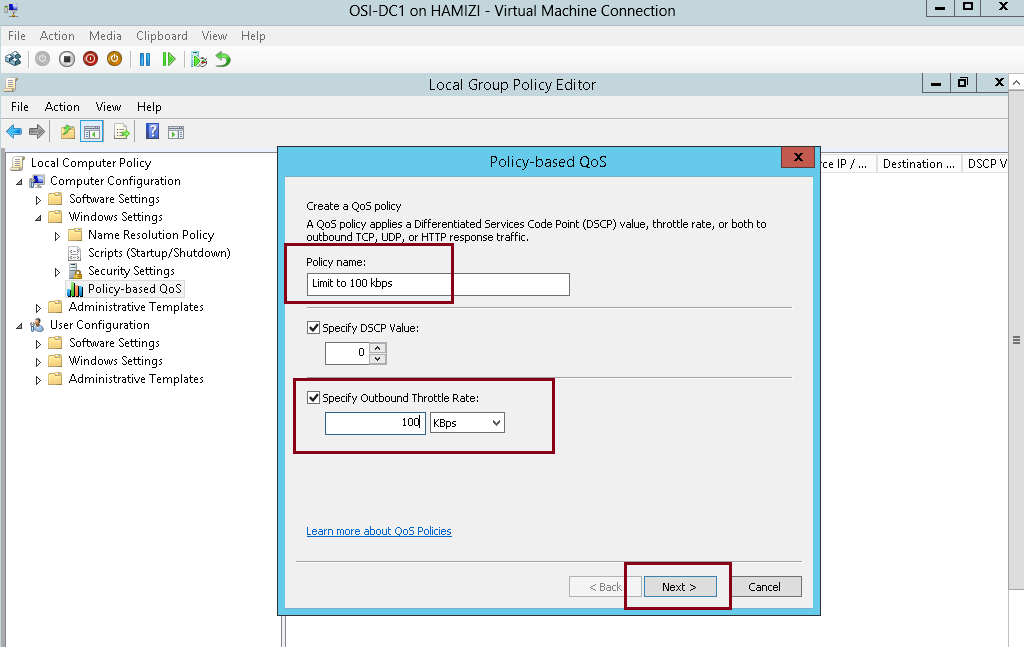
2 – In the Policy-based QoS Wizard, on the Create a QoS policy interface, in the Policy name text box, type Limit to 100 Kbps, and then select the Specify Outbound Throttle Rate check box. In the Specify Outbound Throttle Rate text box, type 100, and then click Next…
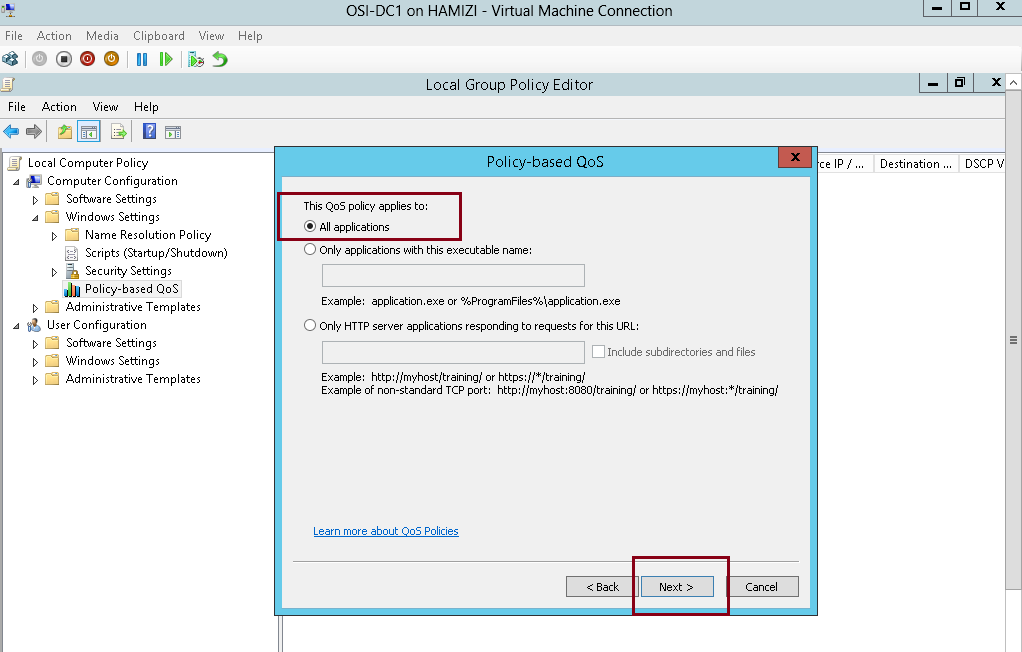
3 – On the This QoS policy applies to interface, click Next…
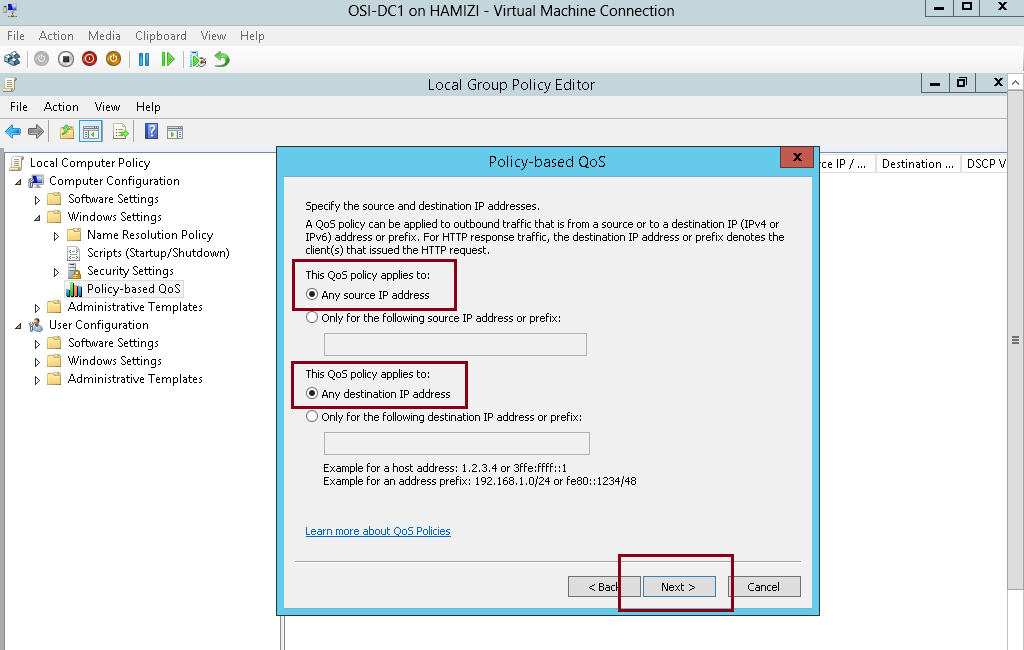
4 – On the Specify the source and destination IP addresses interface, click Next…
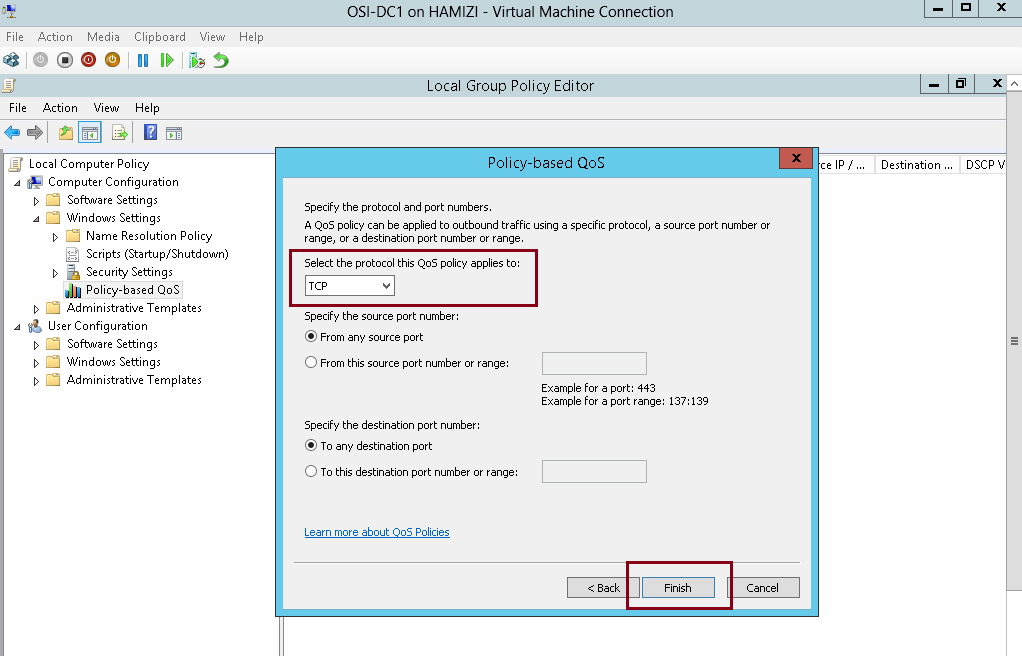
5 – On the Specify the protocol and port numbers interface, click Finish and close Local Group Policy Editor console…
3rd – Enable a File Share for BranchCache
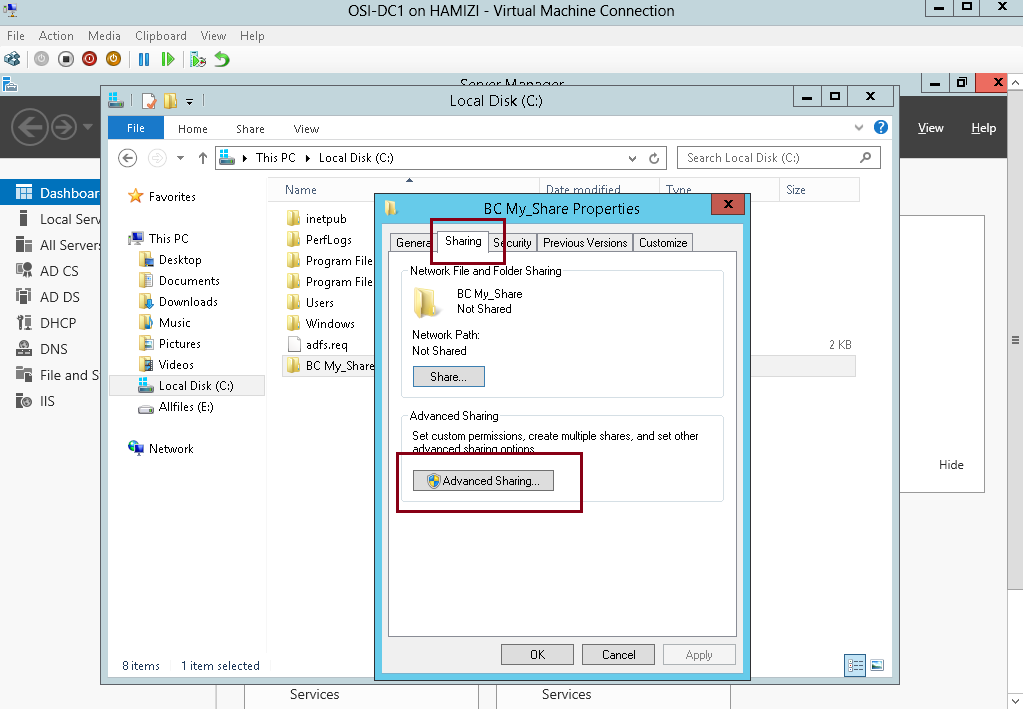
1 – On the Domain Server DC01, create 1 folder called BC My_Share, and then share this folder…
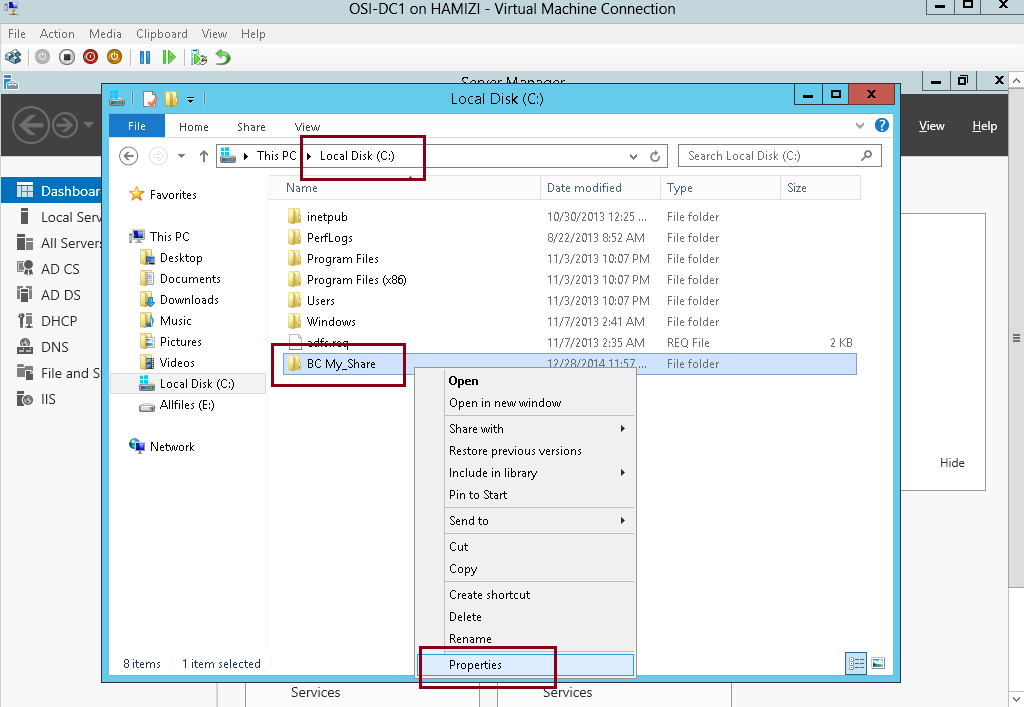
2 – On the BC My_Share properties, click Advanced Sharing…
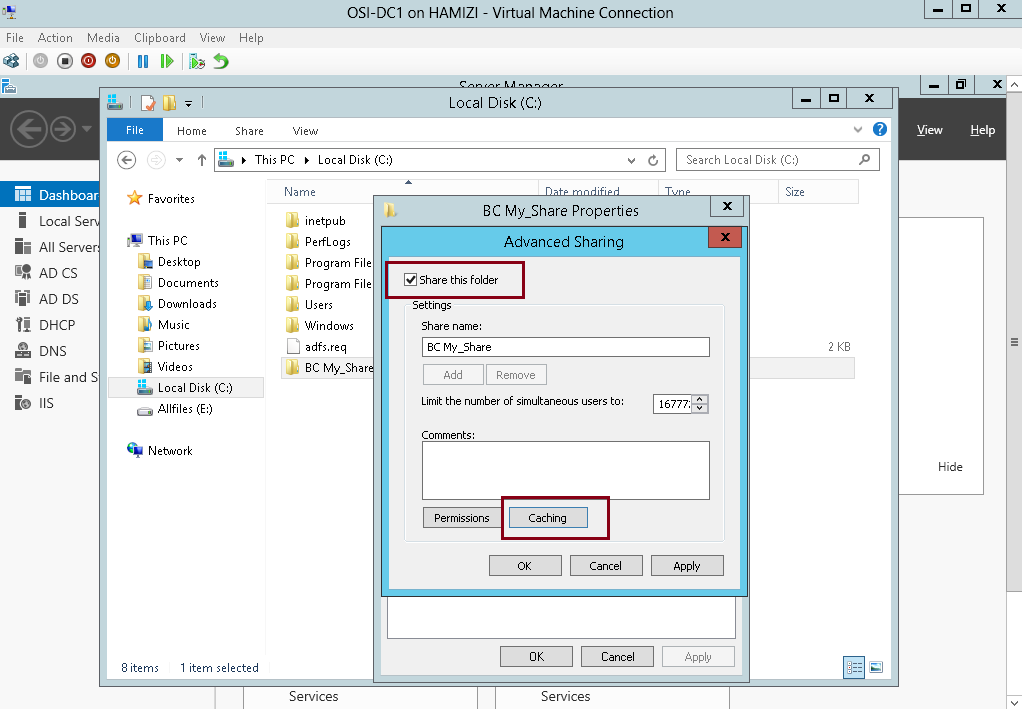
3 – Click Share this folder box, and click Caching…
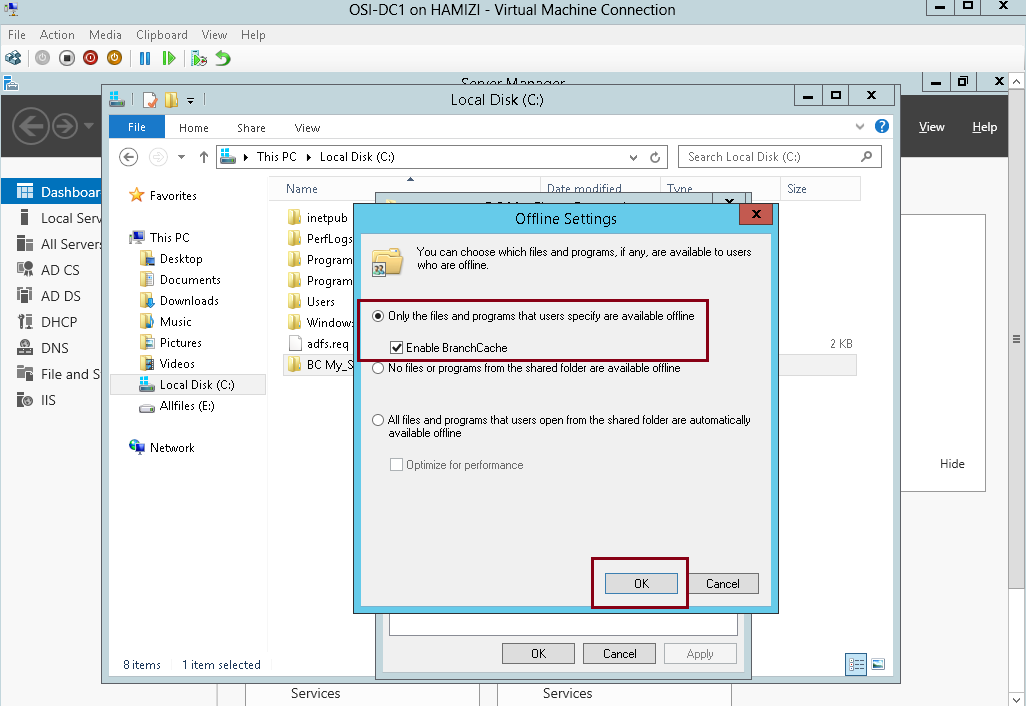
4 – In the Offline Settings box, click Enable BranchCache box, and then click OK…
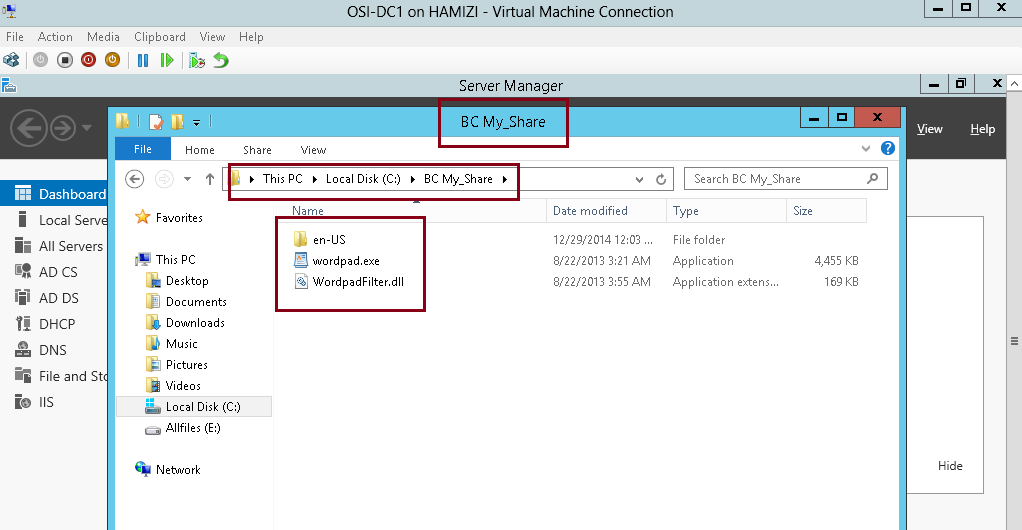
5 – Next, just simply copy any file and paste into the BC My_Share (for this demo i copy WordPad.exe)
4th – Configure client firewall rules for BranchCache
1 – In the Domain Server DC01, open Group Policy Management, then right-click Default Domain Policy, and then click Edit…

2 – In the Group Policy Management Editor, under Computer Configuration, expand Policies, expand Windows Settings, expand Security Settings, and then expand Windows Firewall with Advanced Security…
** expand Windows Firewall with Advanced Security, right-click Inbound Rules, and then click New Rule…

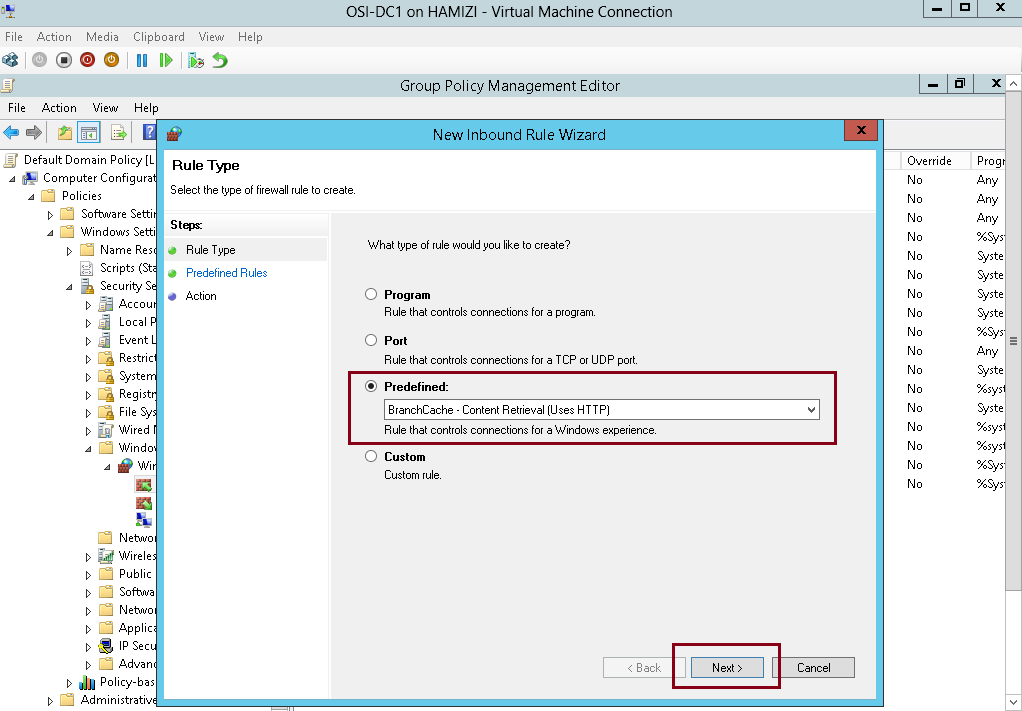
3 – In the New Inbound Rule Wizard, on the Rule Type page, click Predefined, click BranchCache – Content Retrieval (Uses HTTP), and then click Next…
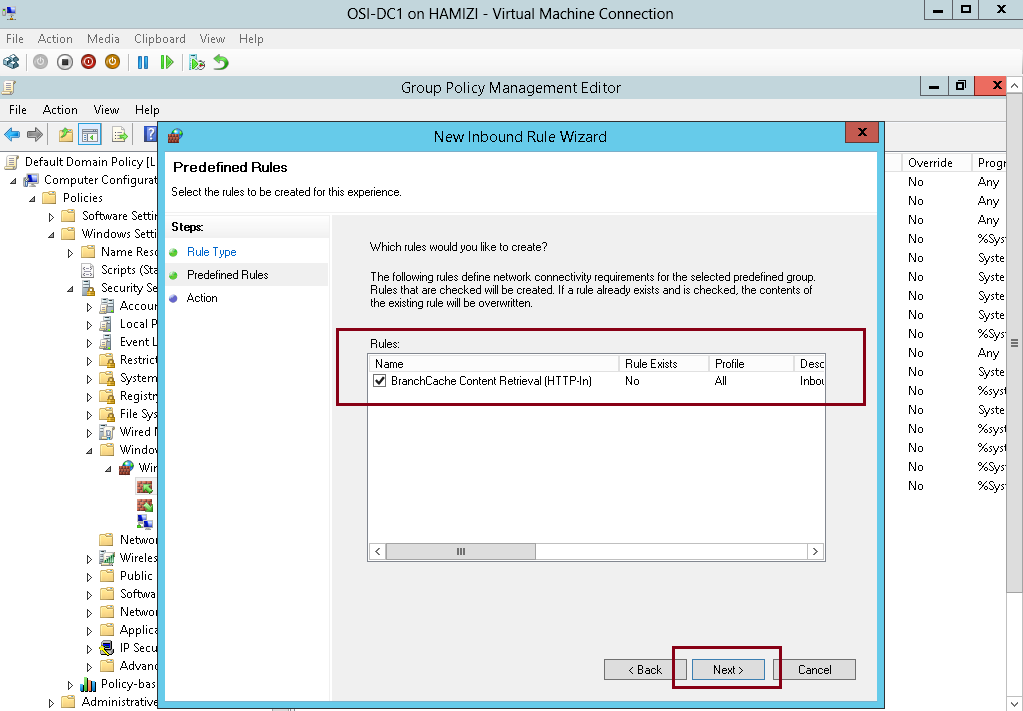
4 – On the Predefined Rules interface, click Next…
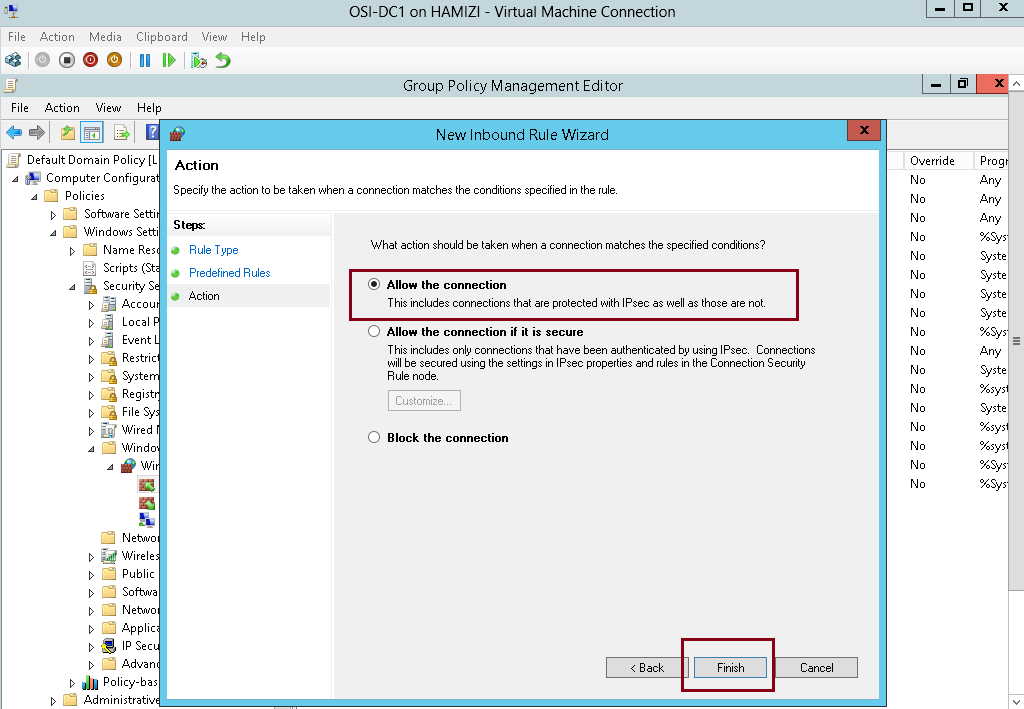
5 – On the Action page, click Finish to create the firewall inbound rule…
6 – Repeat the same step, and this time click Predefined, click BranchCache – Peer Discovery (Uses WSD), and
then click Next and proceed till Finish…

7 – Next, run gpupdate /boot /force command to activate the policy…

5th – Install BranchCache for Network Files role and the BranchCache feature on Member Server
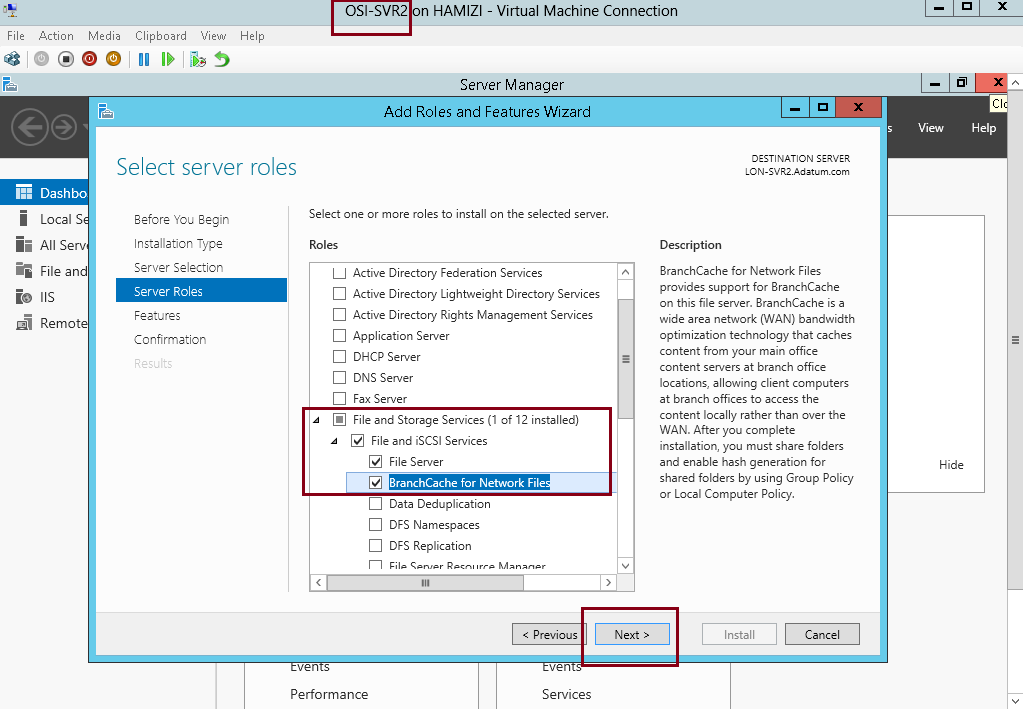
1 – Switch to member Server SVR2, open Server Manager, click Add roles and features and proceed installation to BranchCache for Network Files and proceed to Select Features….
2 – On the Select features interface, click BranchCache, and then click Next…

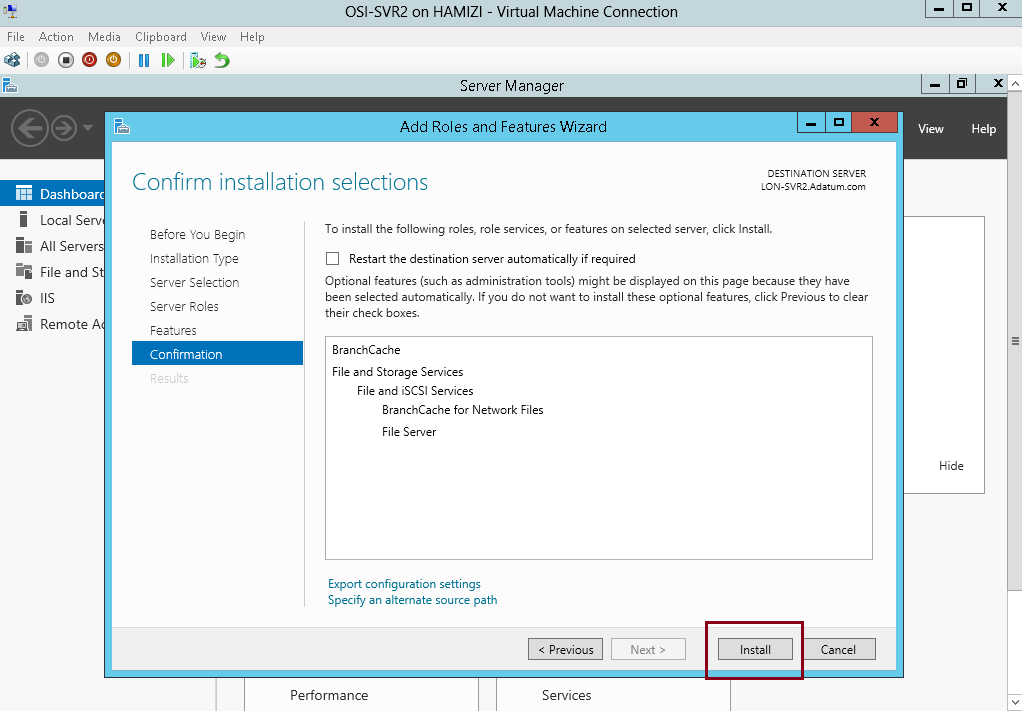
3 – On the Confirm installation selections interface, click Install, and then click Close….
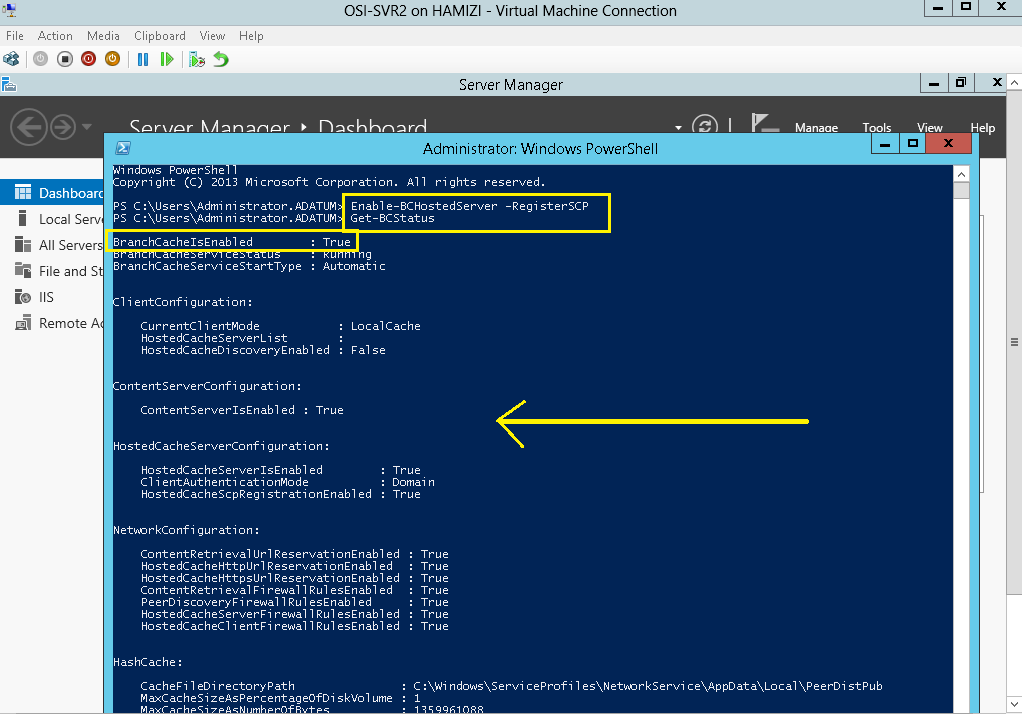
4 – Next, we need to start the BranchCache host server, in the SVR2 server open Windows PowerShell and type :
Enable-BCHostedServer -RegisterSCP
Get-BCStatus
** verify that BranchCache is enabled and running…
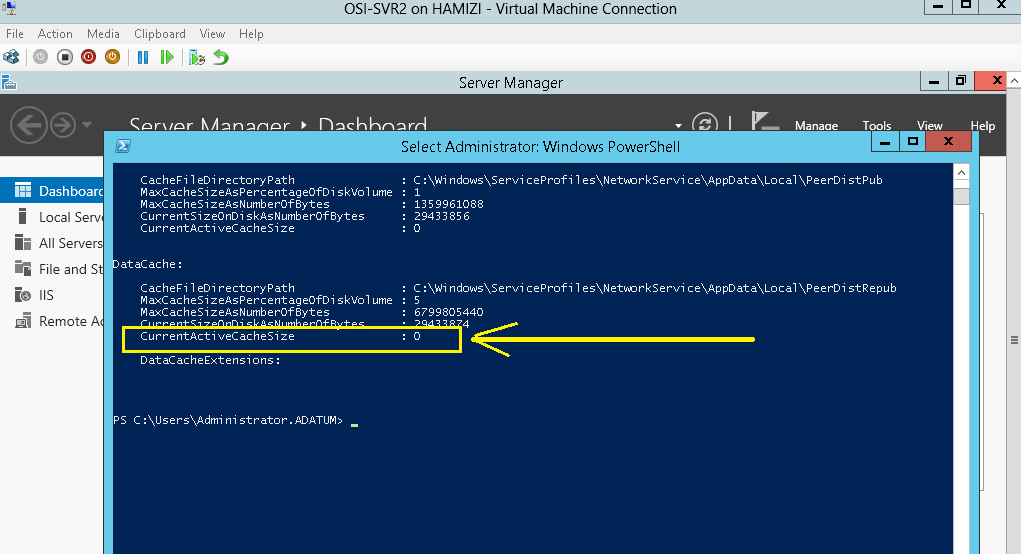
5 – Scroll down to the DataCache section, notice the current active cache size is zero…
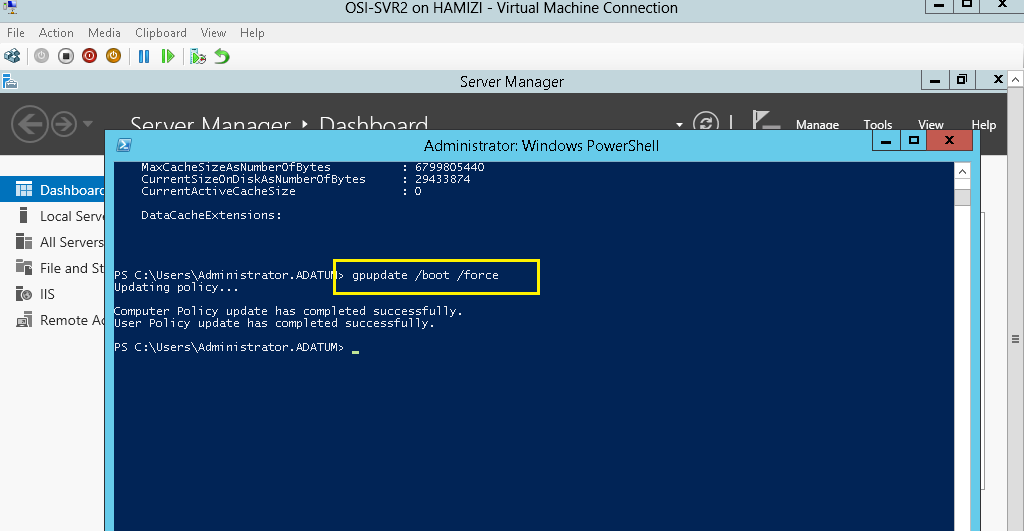
6 – Lastly run the gpupdate /boot /force…
6th – Configure client PC to use BranchCache in hosted cache mode
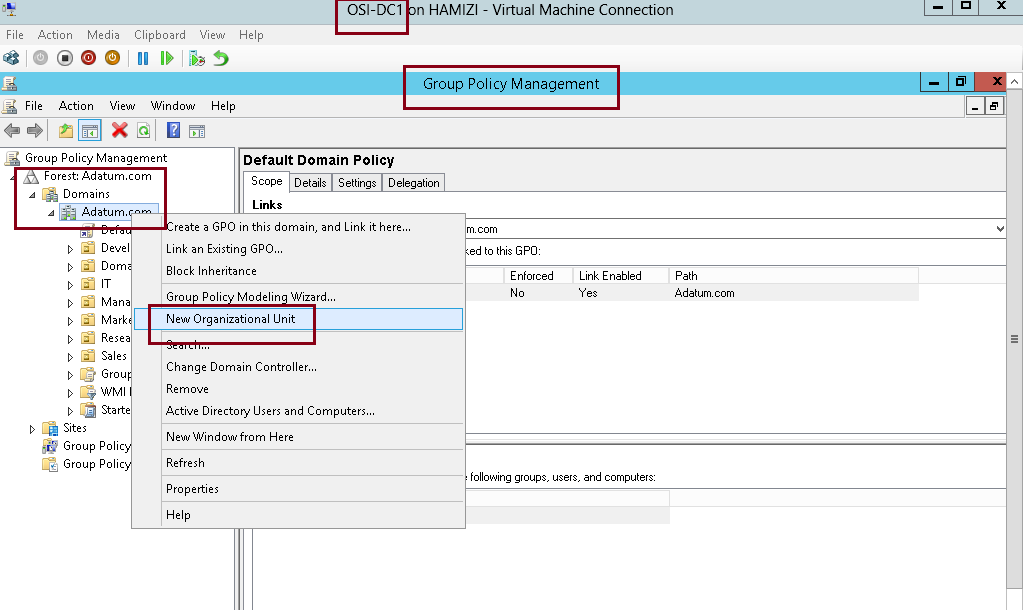
1 – On Domain Server DC01 open Group Policy Management, then right-click Adatum.com, and then click New Organizational Unit…
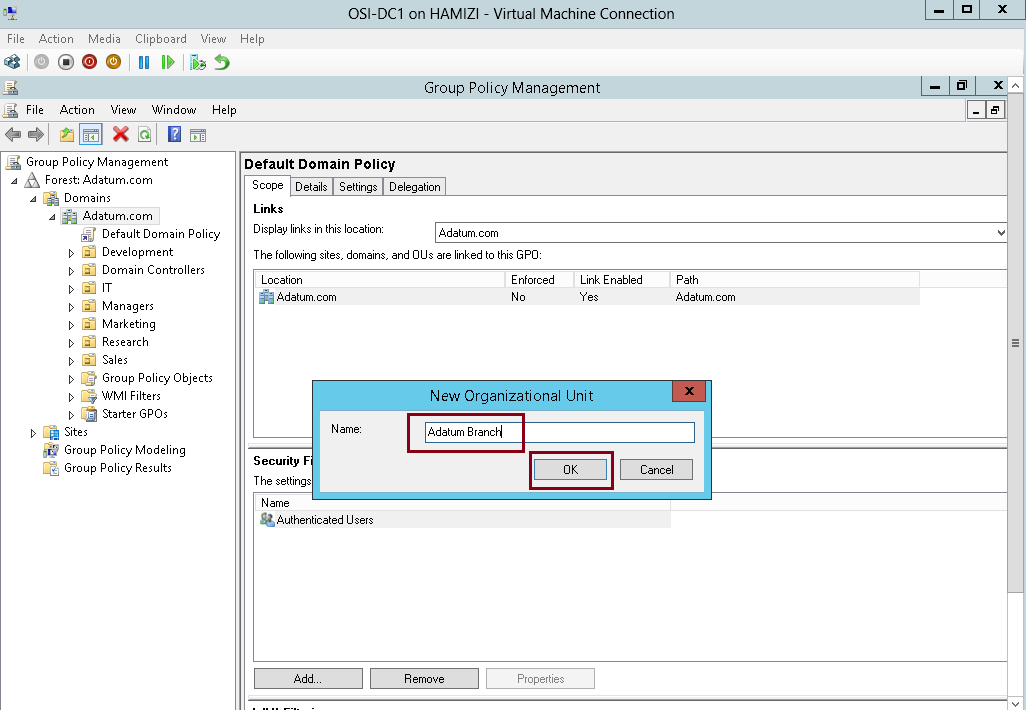
2 – In the New Organizational Unit box, type Adatum Branch and then click OK…
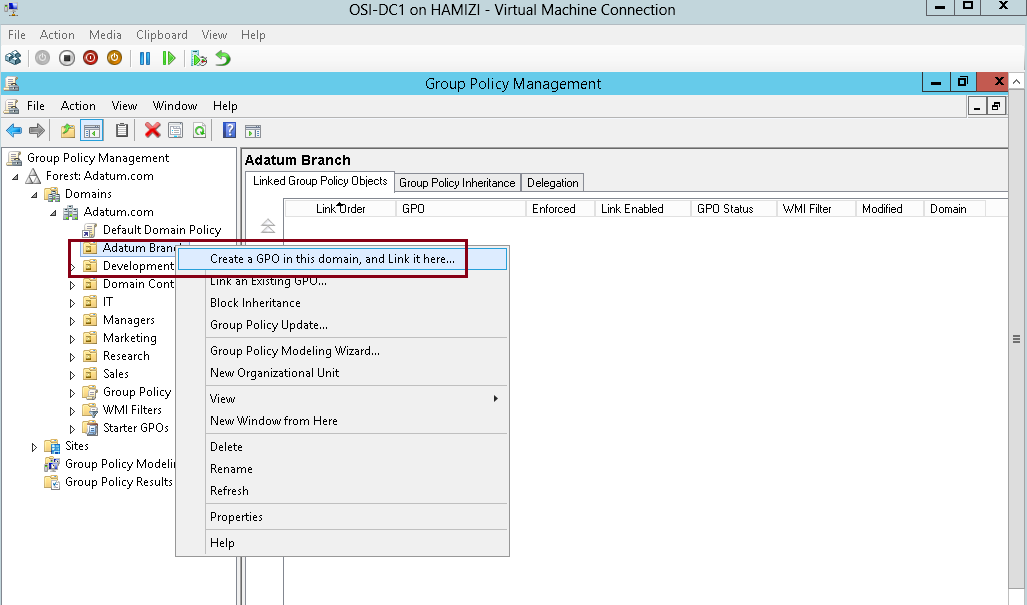
3 – Right-click the Adatum Branch OU and click Create a GPO in this domain, and link it here…
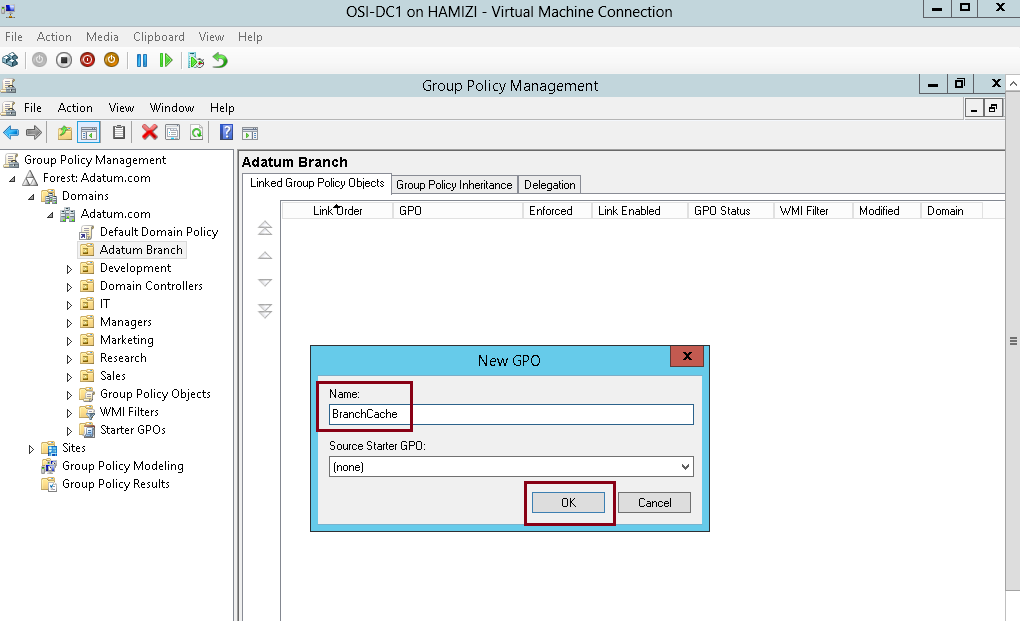
4 – In the New GPO box, type BranchCache, and then click OK…
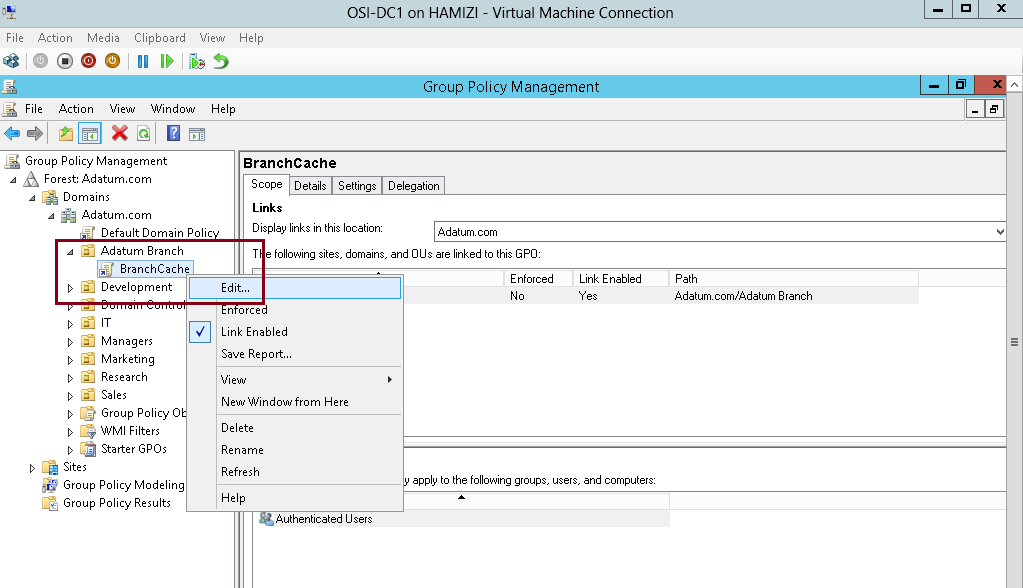
5 – Next, right-click the BranchCache GPO and click Edit…
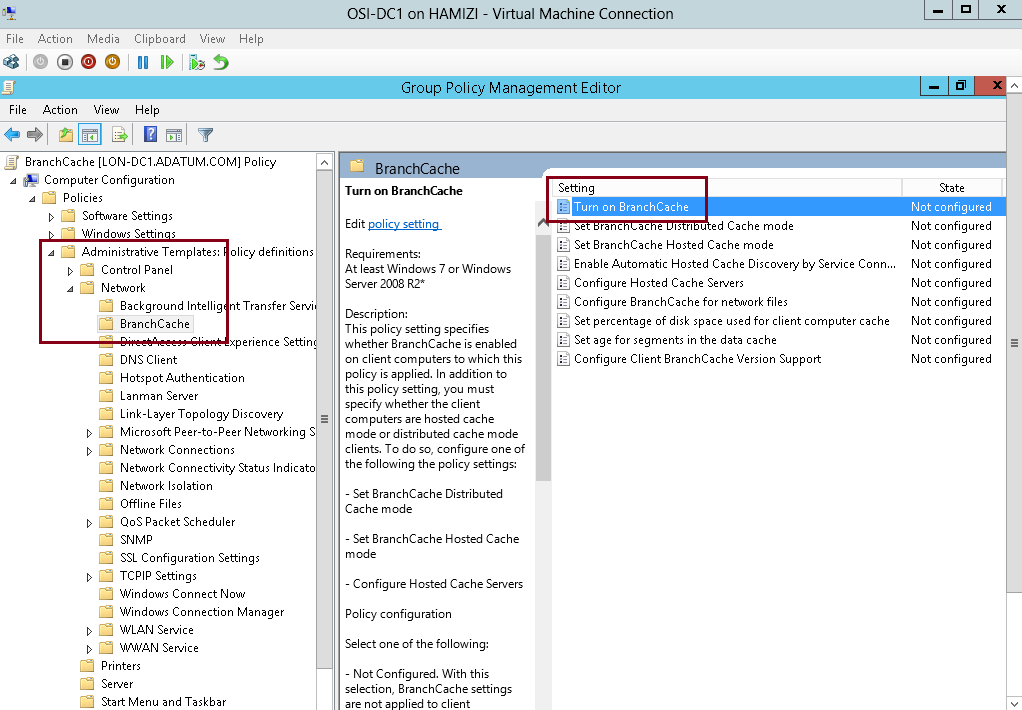
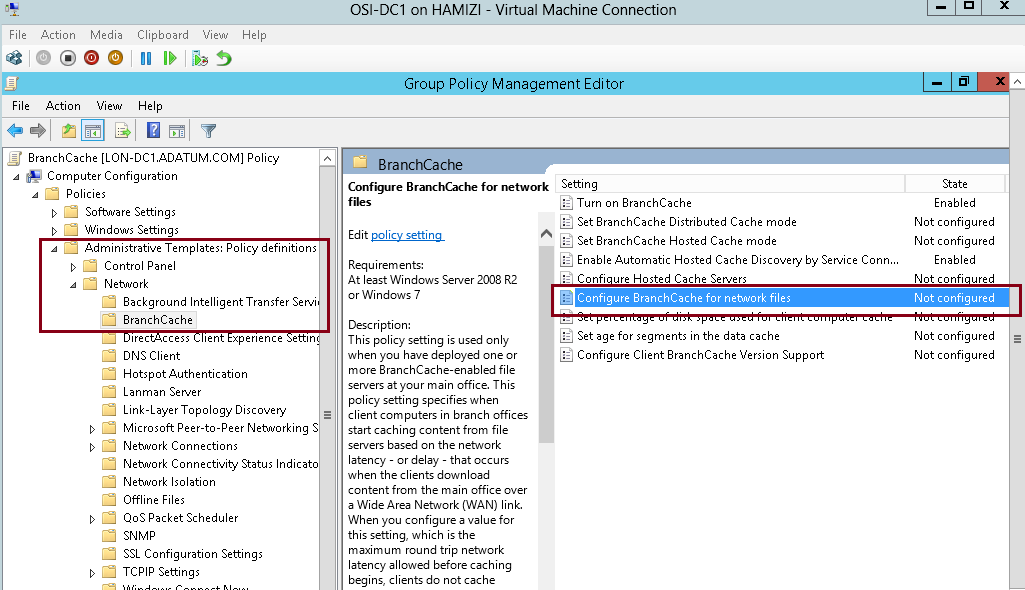
6 – In the Group Policy Management Editor, under Computer Configuration, expand Policies, expand Administrative Templates, expand Network, and then click BranchCache…
** in the Setting list, double click BranchCache…
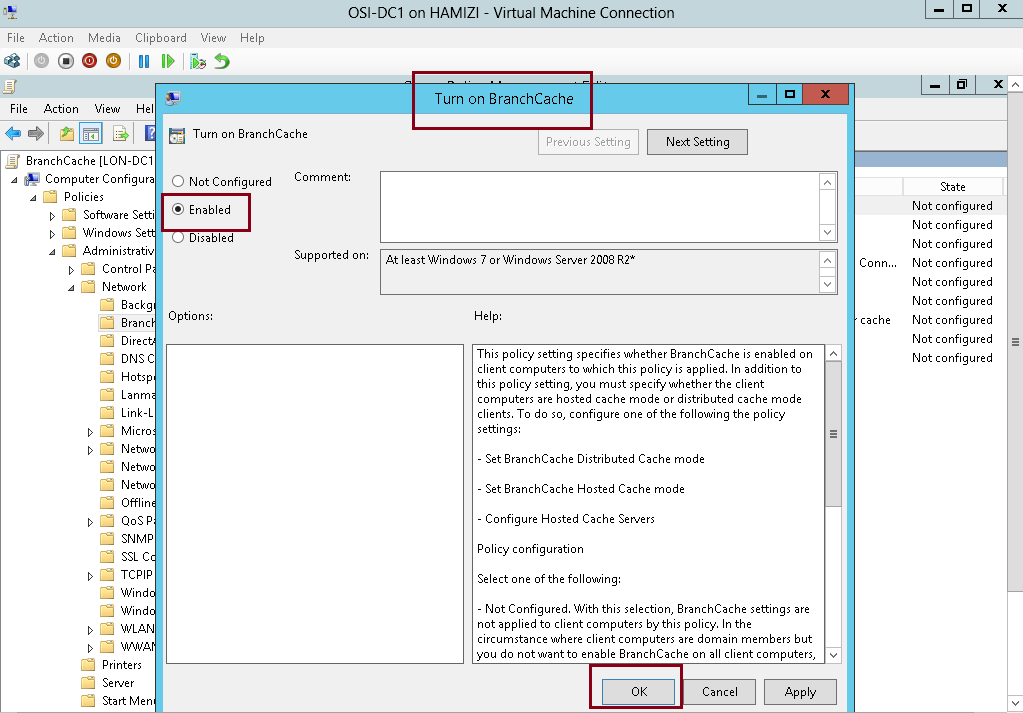
7 – In the Turn on BranchCache box, click Enabled, and then click OK…
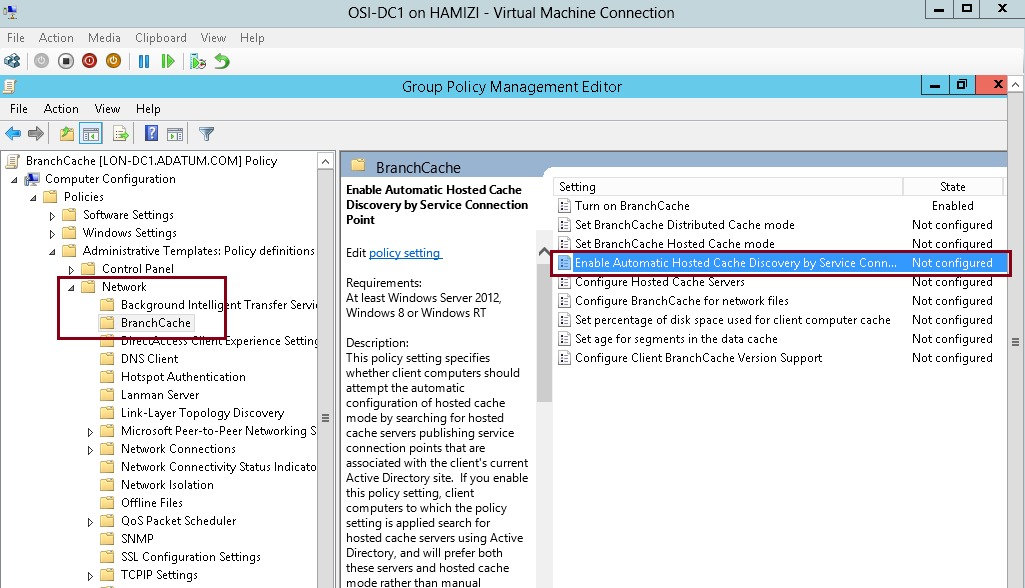
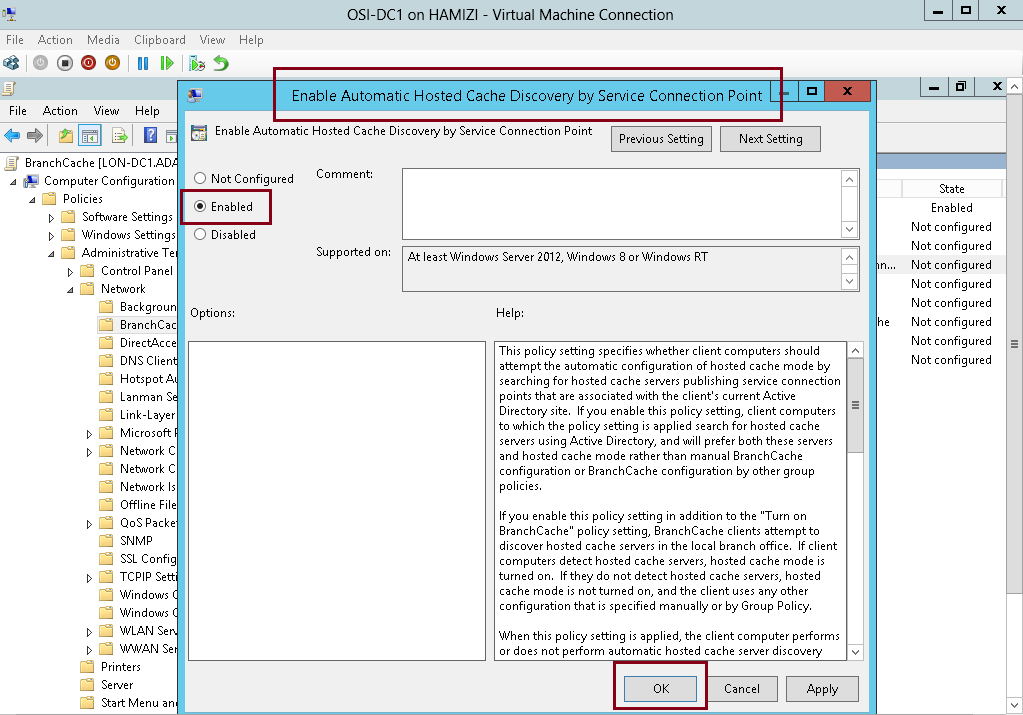
8 – In the BranchCache results pane, double click Enable Automatic Hosted Cache Discovery by Service Connection Point….
9 – In the Enable Automatic Hosted Cache Discovery by Service Connection Point box, click Enabled, and then click OK…
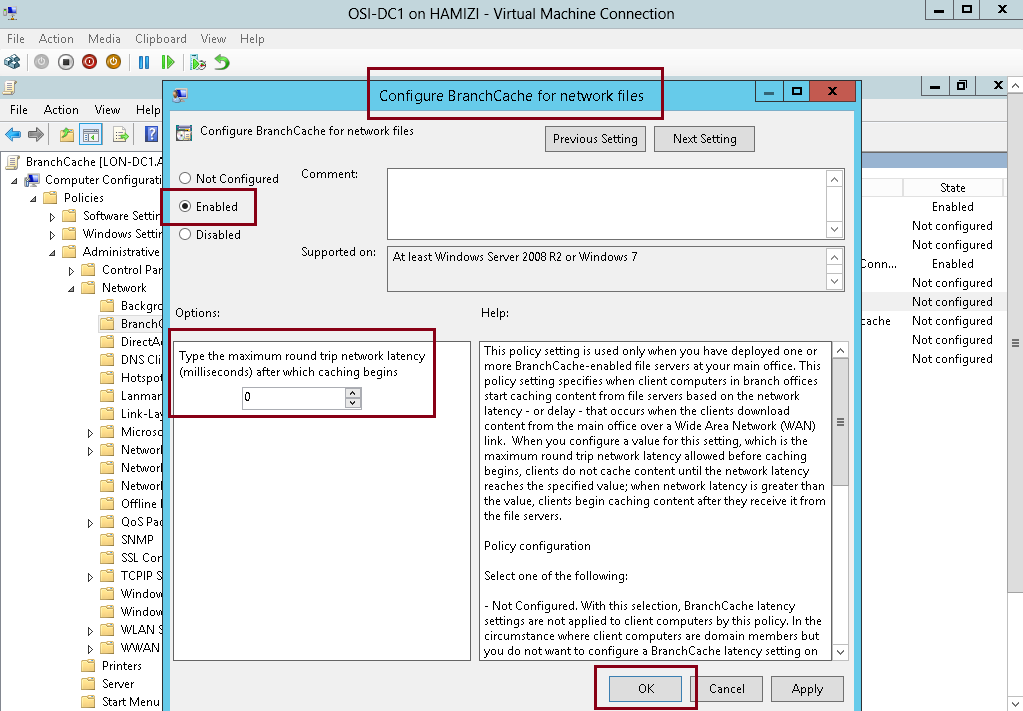
10 – In the BranchCache results pane, double click Configure BranchCache for network files, and then click Edit…
11 – In the Configure BranchCache for network files box, click Enabled, in the Type the maximum round trip network latency (milliseconds) after which caching begins text box, type 0, and then click OK.
“This setting is required to simulate access from a branch office and is not typically required…”
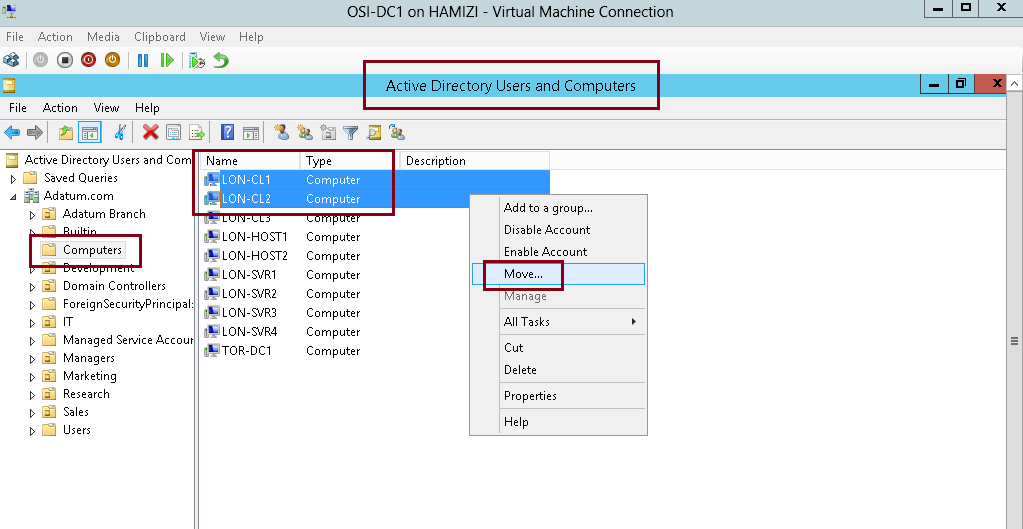
12 – Next, open Active Directory Users and Computers, and move any clients PC that you have in Computetr OU to Adatum Branch OU…

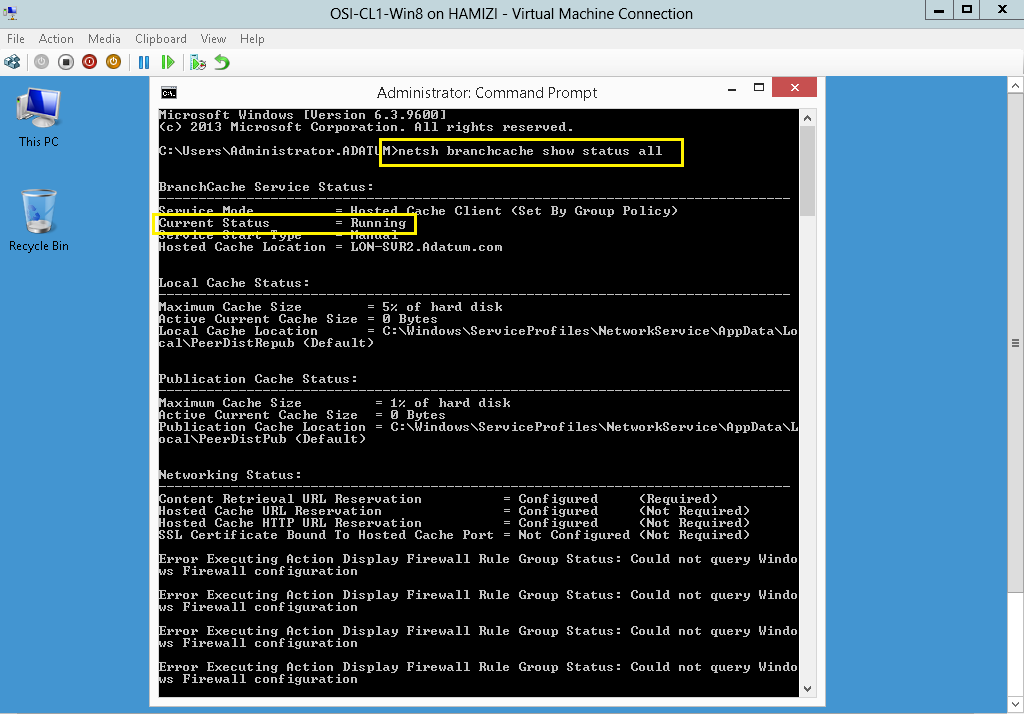
13 – Next, switch to Client PC, open CMD and type : netsh branchcache show status all
** Verify that the BranchCache Current Status is Running. If the status is Stopped, restart the client machines.
7th – Monitoring BranchCache
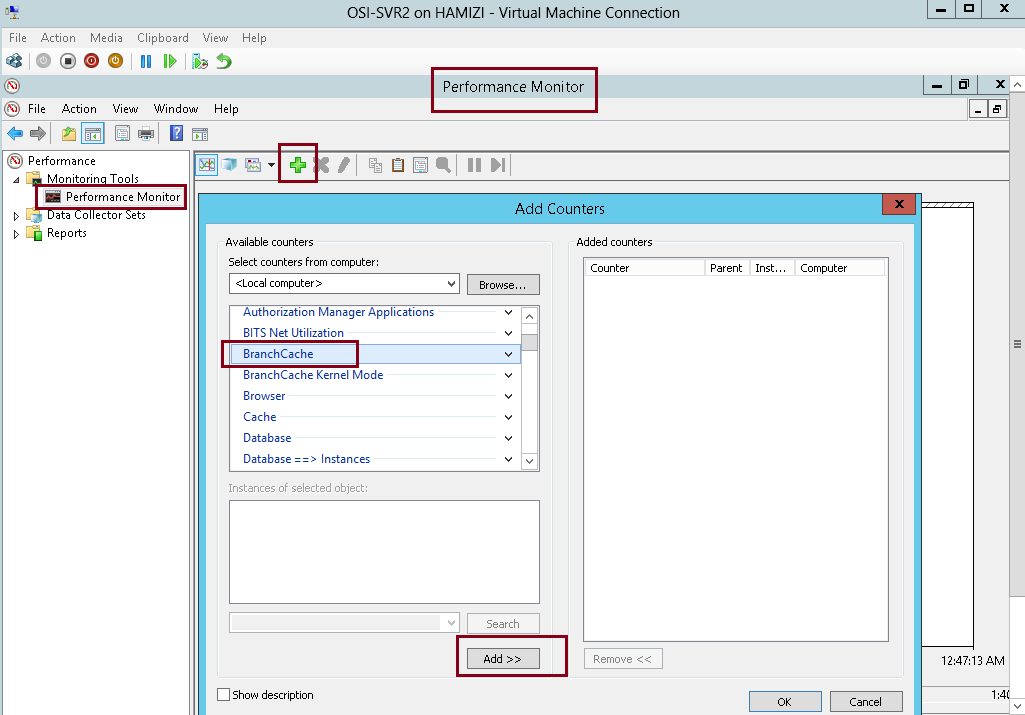
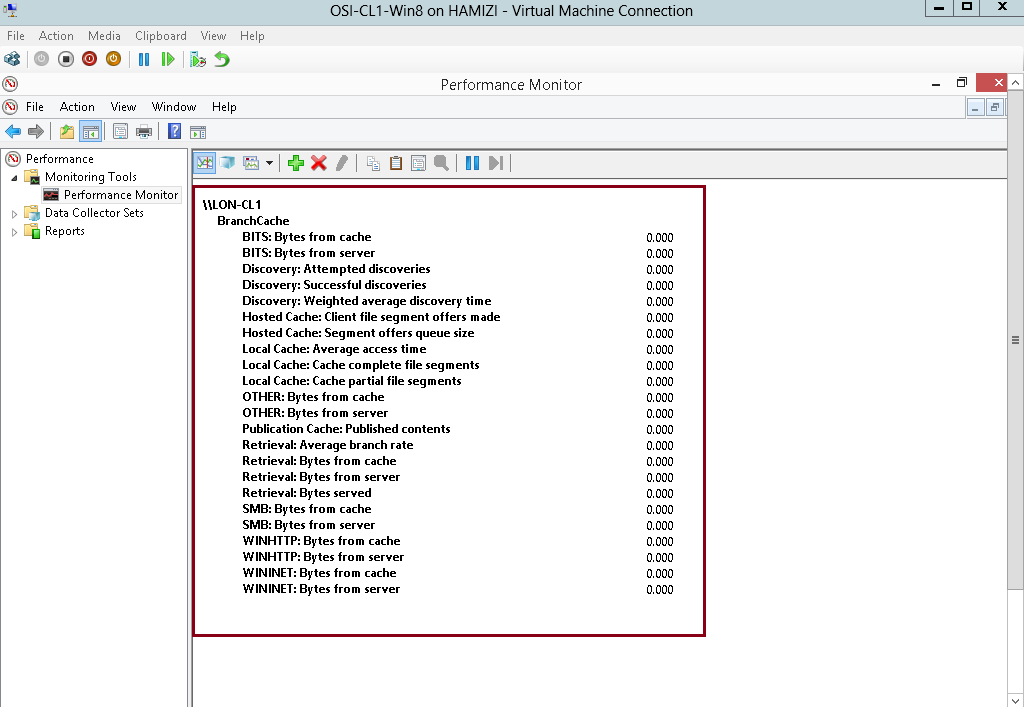
1 – Switch to SVR2 Server and open Performance Monitor…
** under Monitoring Tools, click Performance Monitor, then click the Add icon…
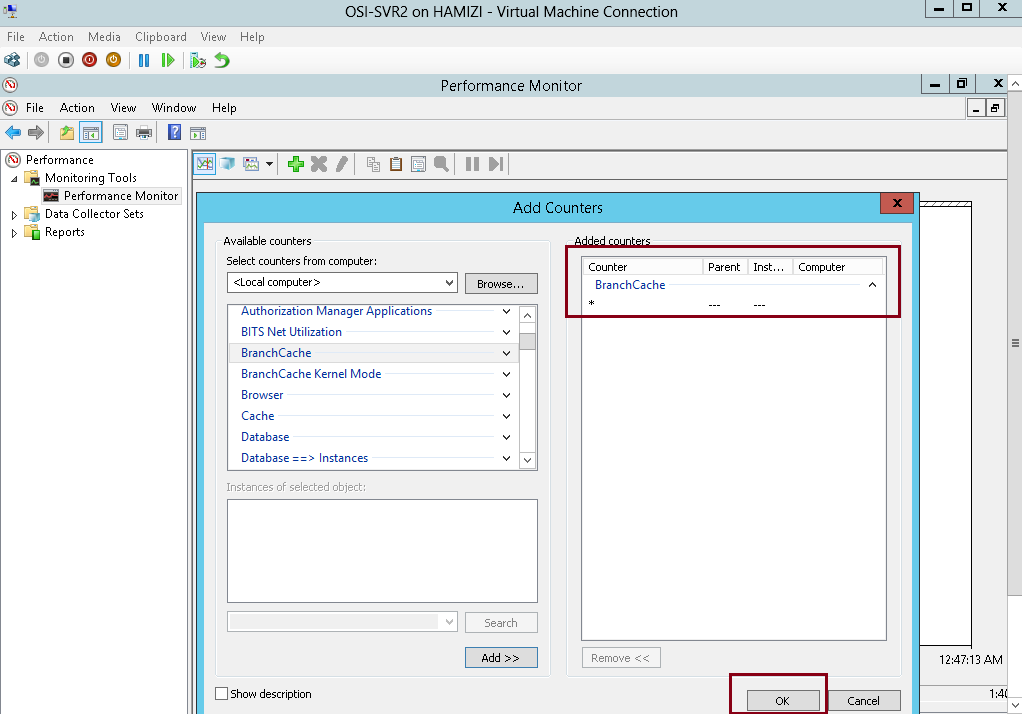
** In the Add Counters box, under Select counters from computer, click BranchCache, click Add…
2 – and then click OK…
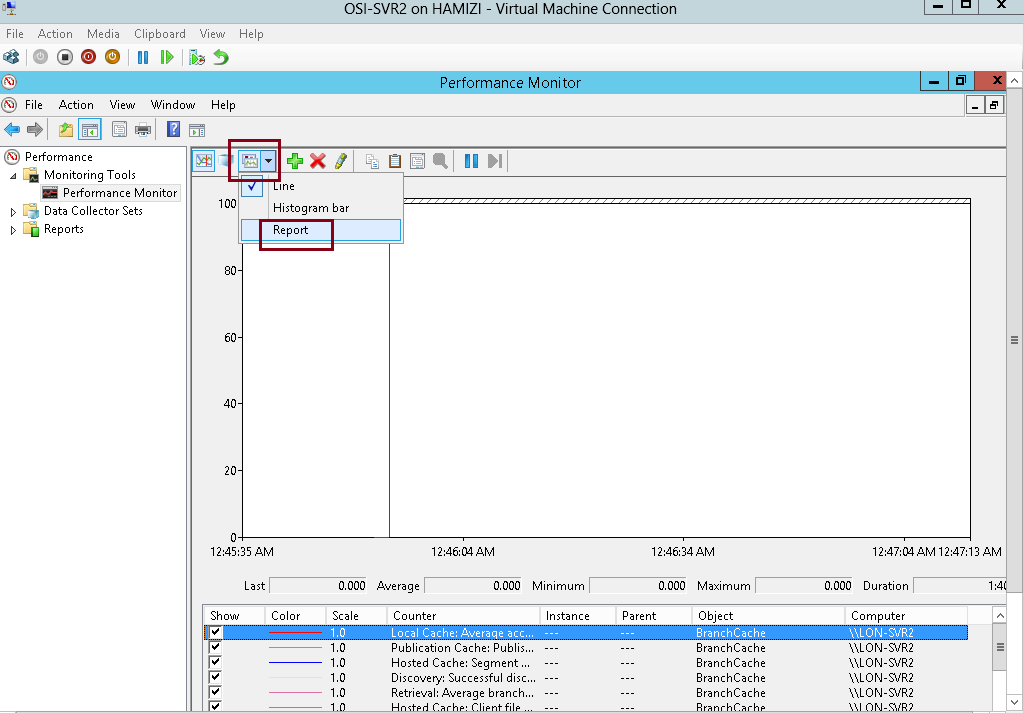
3 – On the Change Graph type button, select Report…
4 – Switch to Client PC, and repeat the step previously for Performance Monitor & add BranchCache….
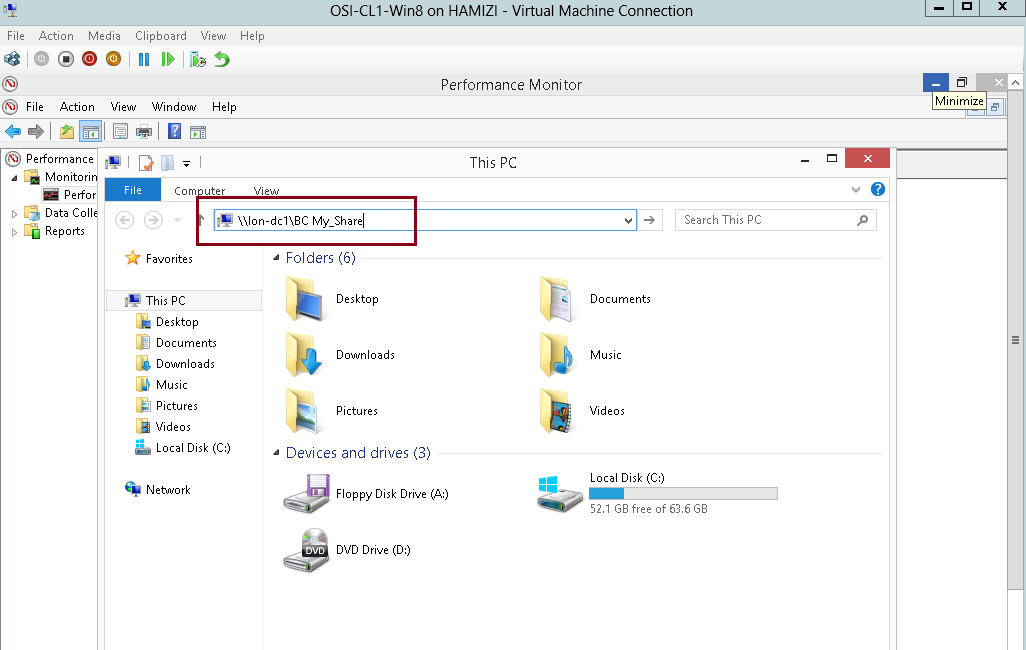
5 – Now lets the BranchCache, on the client PC, access to \\lon-dc1\BC My_Share folder….
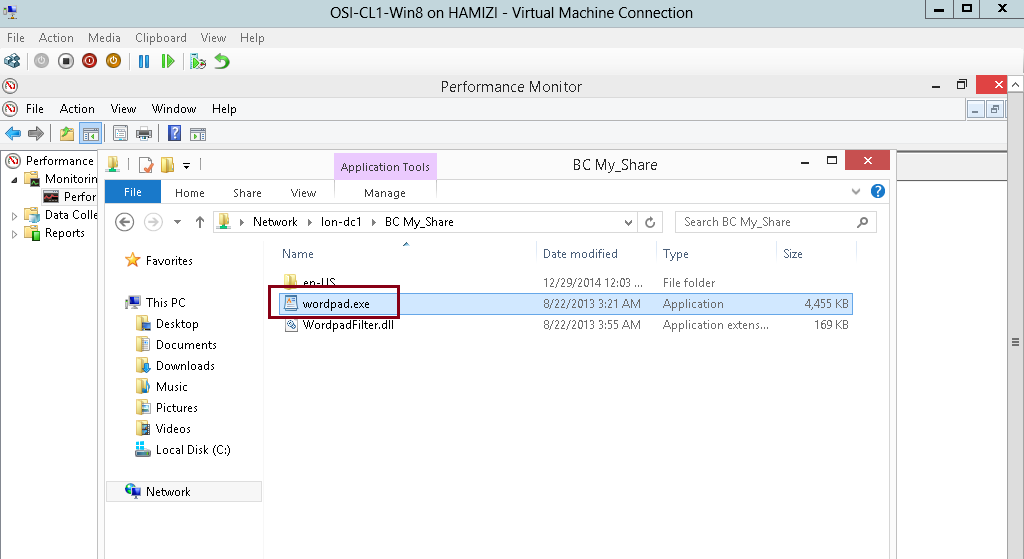
6 – Copy the whole file in the BC My_Share folder and then paste to your client PC desktop…
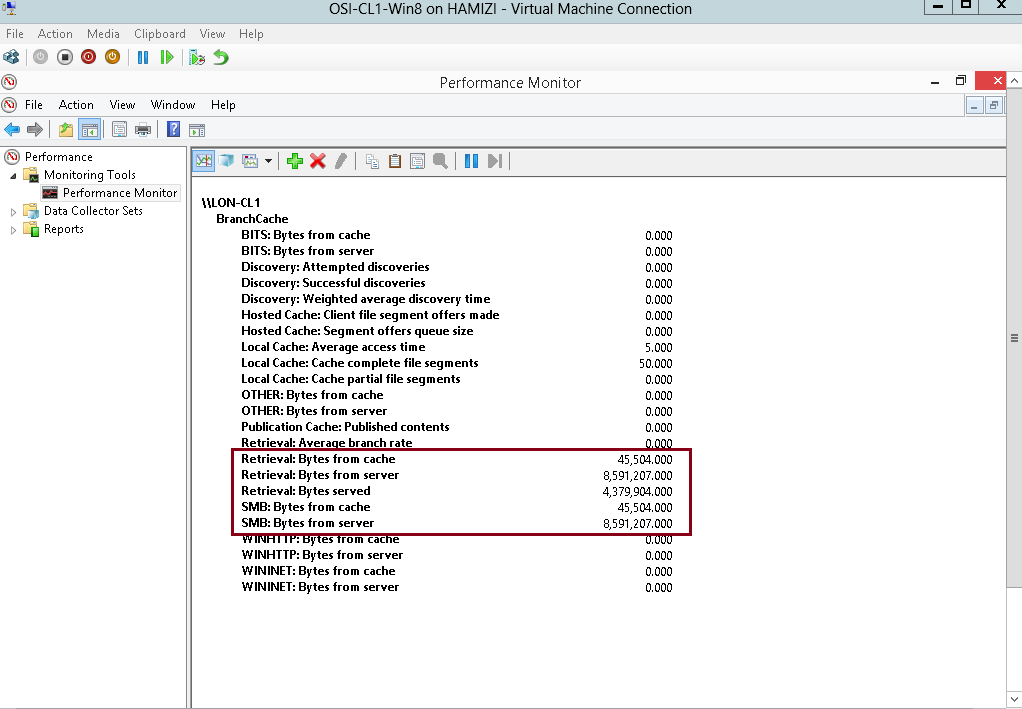
7 – Read the performance statistics on client PC.
** This file was retrieved from LON-DC1 (Retrieval: Bytes from Server).
** After the file was cached locally, it was passed up to the hosted cache. (Retrieval: Bytes Served)
that’s all for now.. i hope you all enjoy the demo on the BranchCache…