
Step by Step : Installing & Configuring WSUS in Server 2012 R2
Hi folks,
Today lets go through a step by step on how to installing & configuring WSUS in Windows Server 2012 R2.
But as usual, before we start, let me explain a little bit about WSUS (Windows Server Update Services).
What Is WSUS?
WSUS is a server role included in the Windows Server 2012 R2 OS, and that downloads and distributes updates to Windows clients and servers.
WSUS can obtain updates that are applicable to the OS and common Microsoft applications such as Microsoft Office and Microsoft SQL Server.
In the simplest configuration, a small organization can have a single WSUS server that downloads updates from Microsoft Update.
The WSUS server then distributes the updates to computers that are configured to obtain automatic updates from the WSUS server. You must approve the updates before clients can download them.
For more info about WSUS, please browse to http://technet.microsoft.com/en-us/windowsserver/bb332157.aspx, and for those who will be joining my Win Svr 2012 R2 class this coming months, not to worries because WSUS will be available as our Hands-On Lab. 🙂
Orait, for those who following my blog, you should know know that I had my own small infrastructure built on Windows Server 2012 R2 and my client which is Windows 8.
So for this WSUS demo, I will be using my Domain Server which is DC01.comsys.local and my client Surface01.comsys.local.
Before we start, please do understand that, all this implementation & configuration of this WSUS is happening in Hyper-V, and all my small infra is running fully virtualization, and since this WSUS is involve with internet connection, please do remind also that you need an internet connection attach to VM.
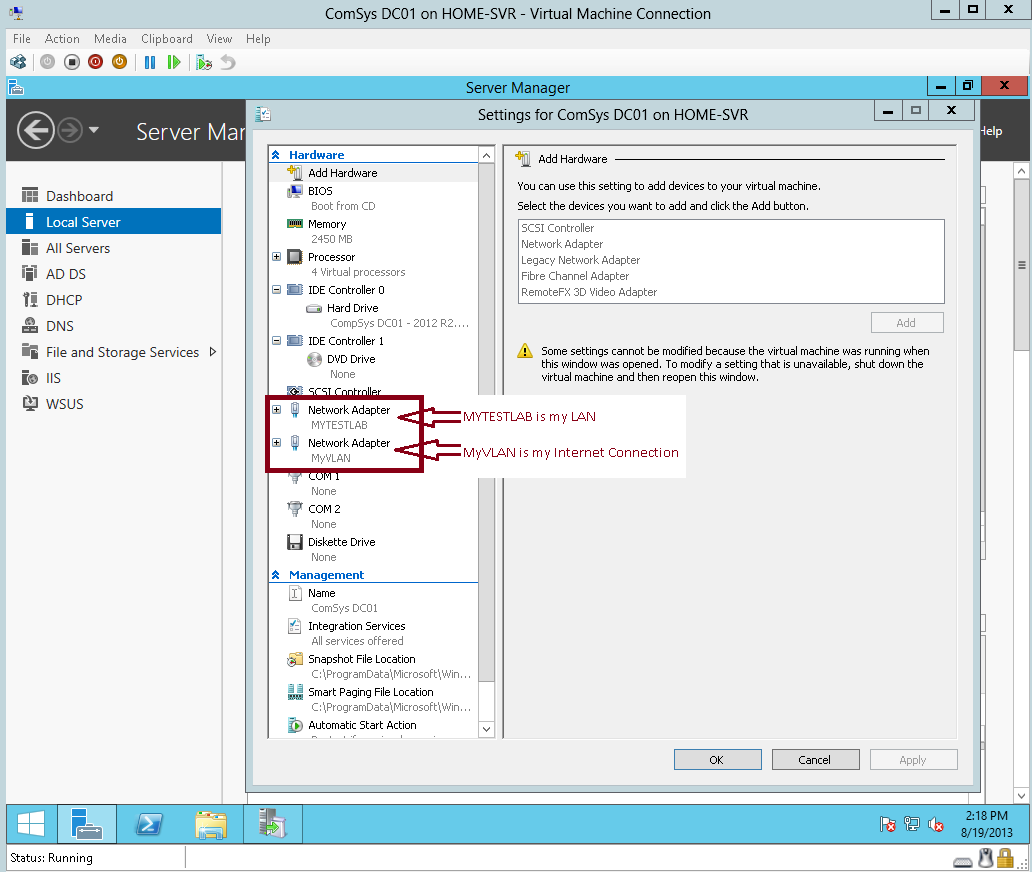
Please make sure you Domain Server @ any Server that you want to install WSUS must have internet connection so that easy for you to stimulate the WSUS process, so that please attach 2nd Network Adapter to WSUS Server to be.
If you’re not sure please refer to this print screen :
So, once you confirm that your WSUS Server having internet connection, lets proceed with the WSUS installation Process.
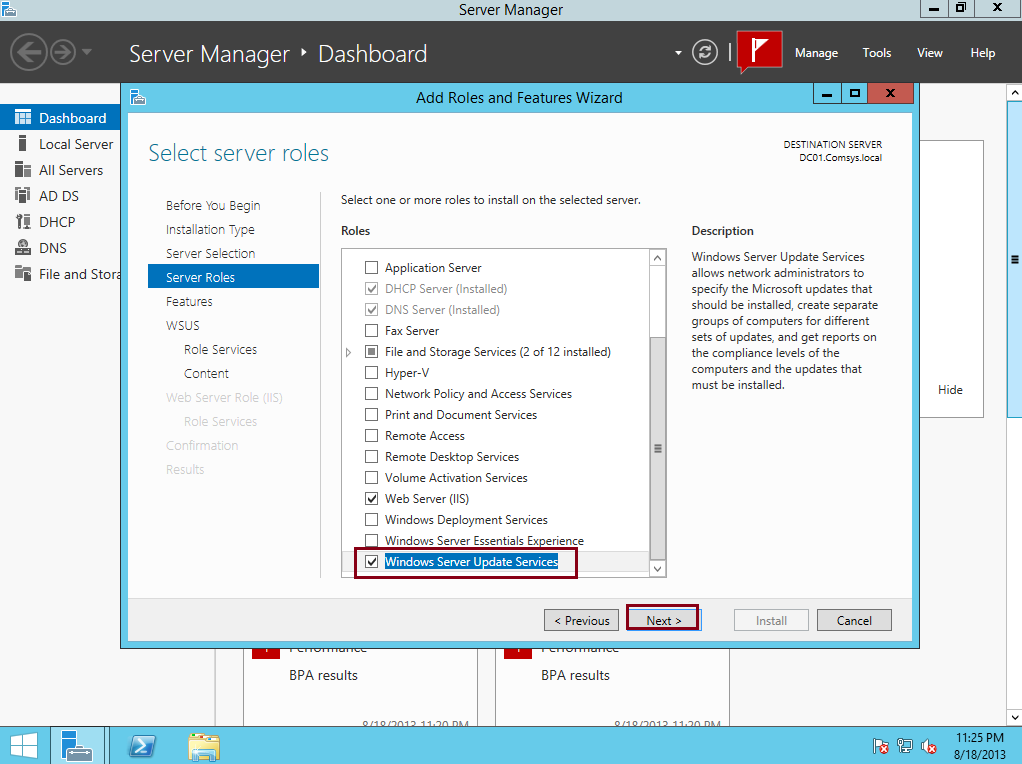
1 – On your Server, open Server Manager, on the Dashboard, click Add Roles and Features then click next 3 times till you get Select server roles box, in Select server roles box, select the Windows Server Update Services (In the pop-up window, click Add Features)… then click Next…
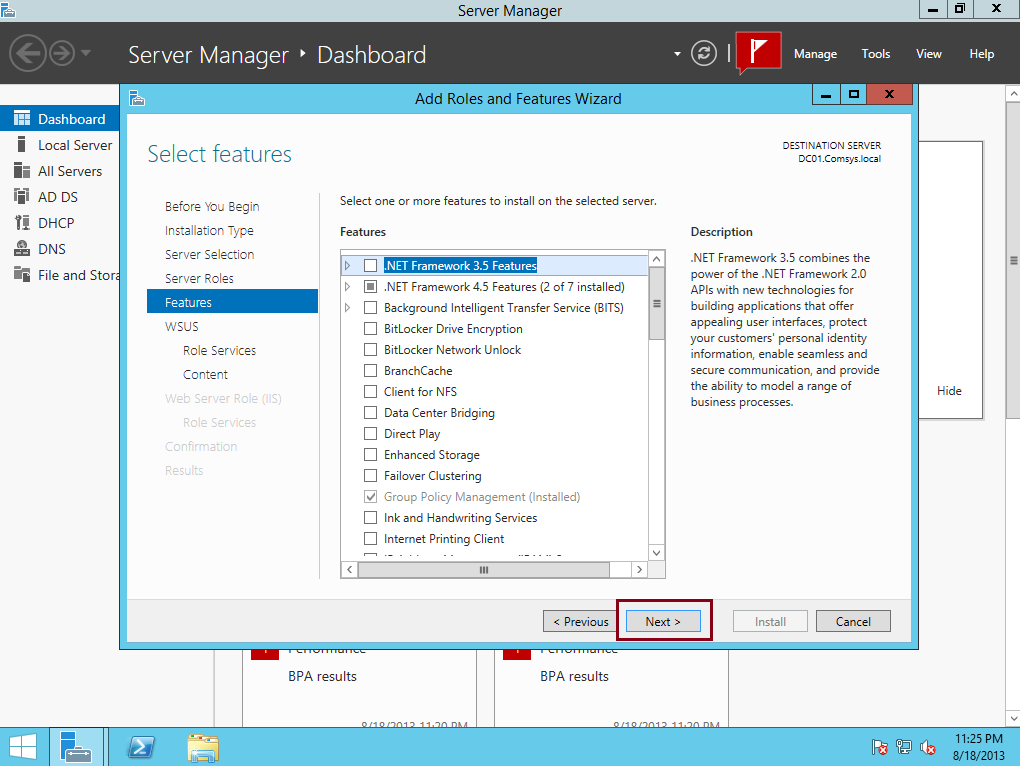
2 – On the Select features box, click Next…
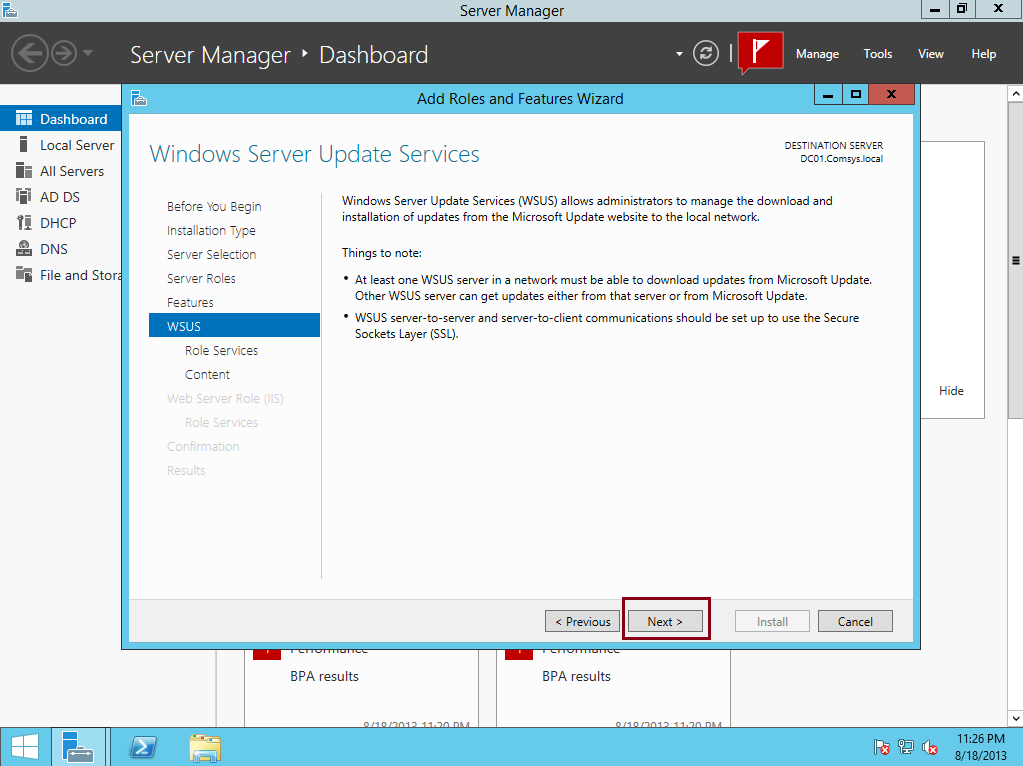
3 – On the Windows Server Update Services box, click Next…
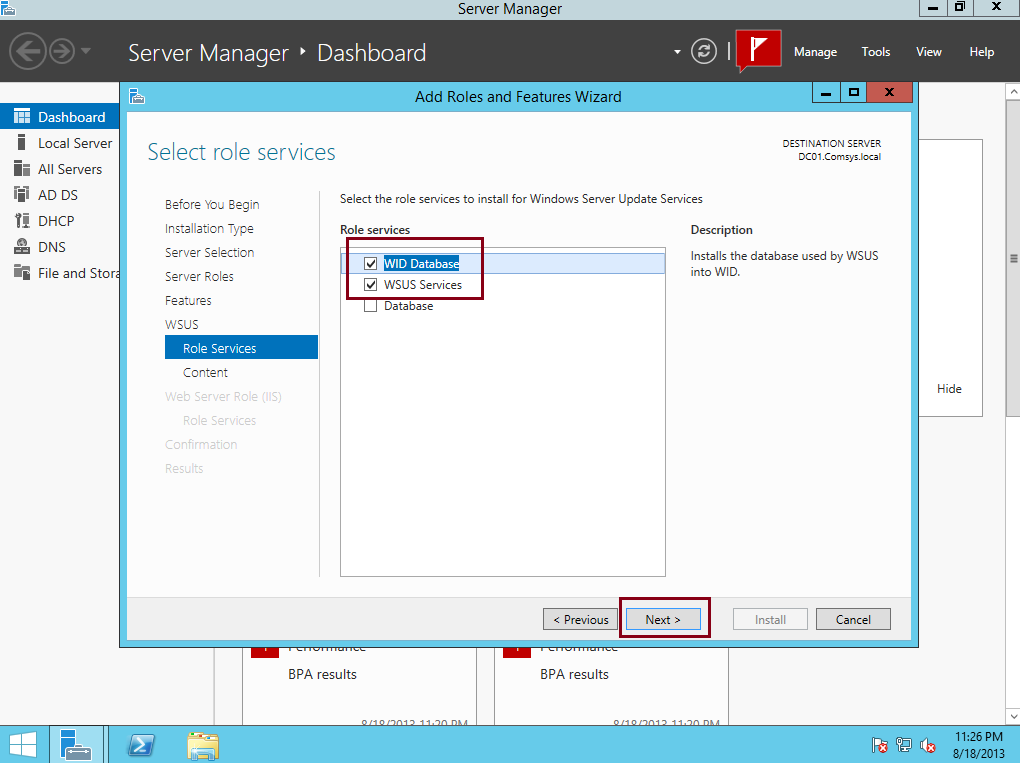
4 – On the Select role services box, verify that both WID Database and WSUS Services are selected, and then click Next…
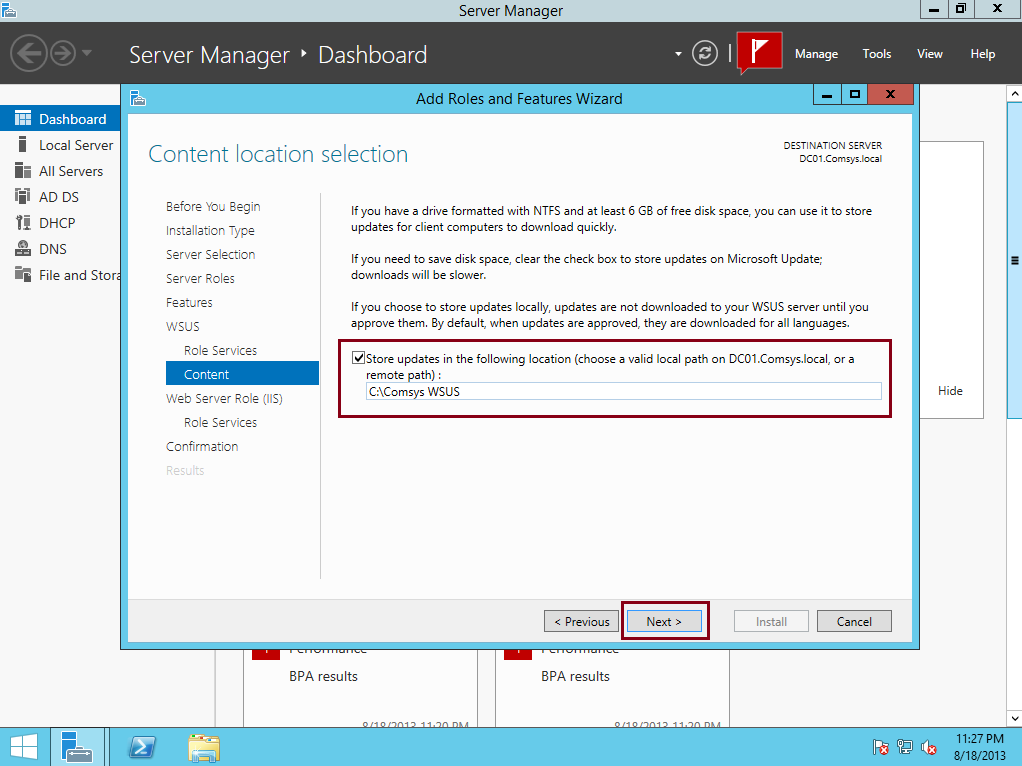
5 – On the Content location selection box, type C:\Comsys WSUS, and then click Next…
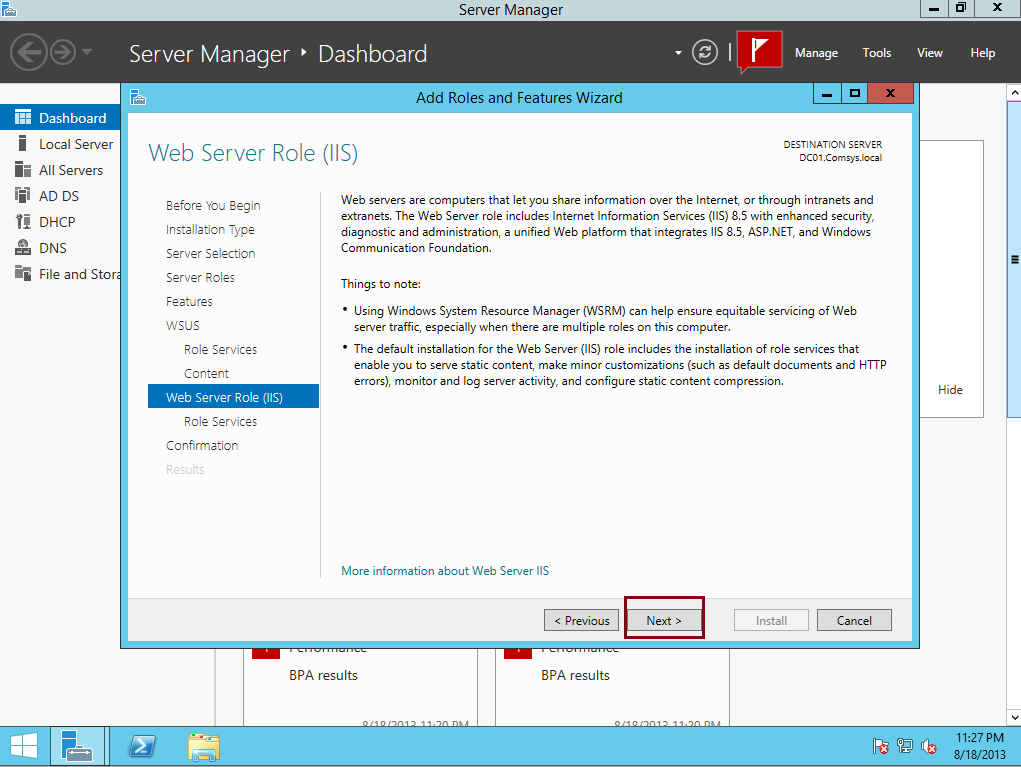
6 – On the Web Server Role (IIS) box, click Next…
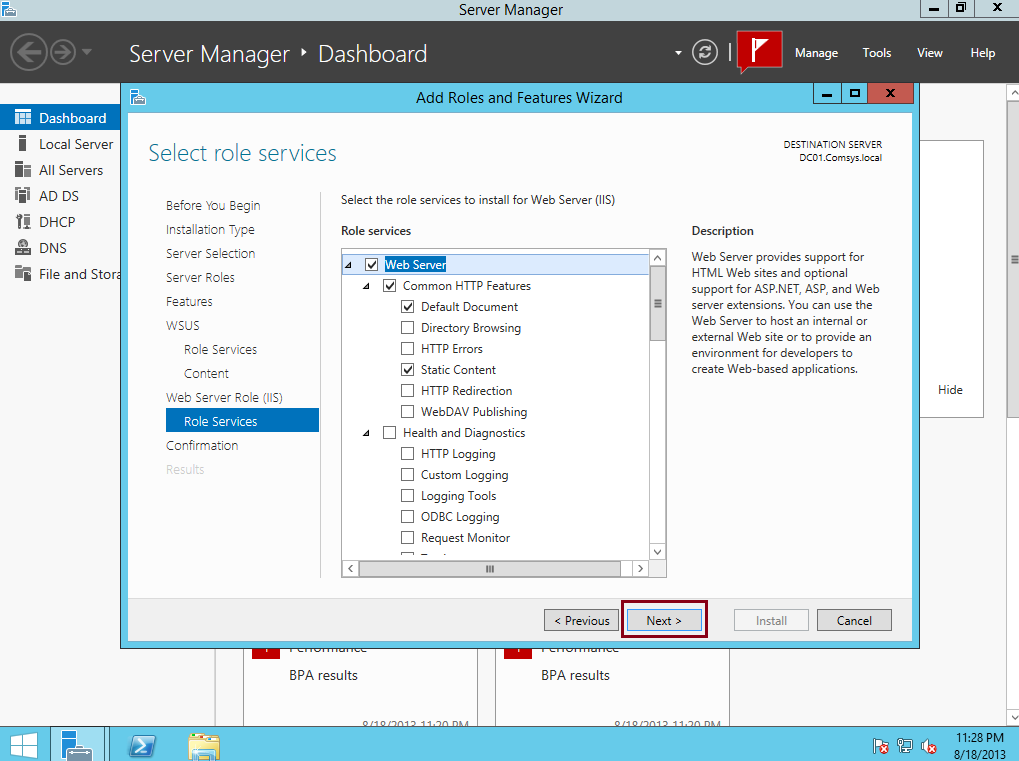
7 – On the Select role services box, click Next…
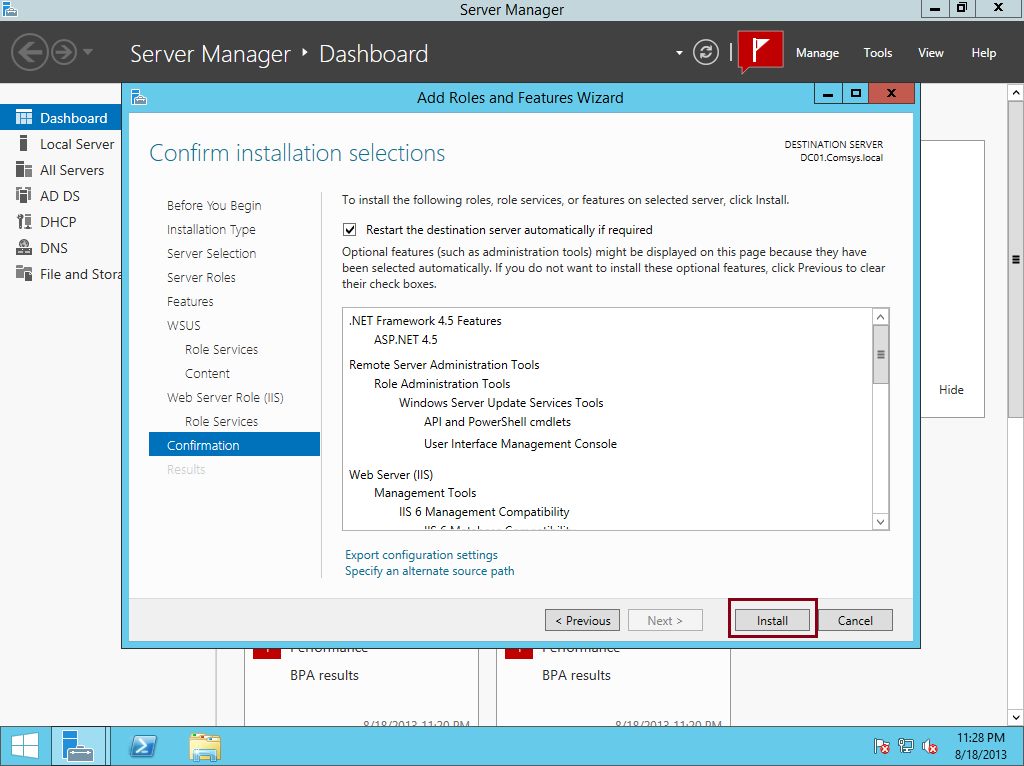
8 – On the Confirm installation selections box, click Install…
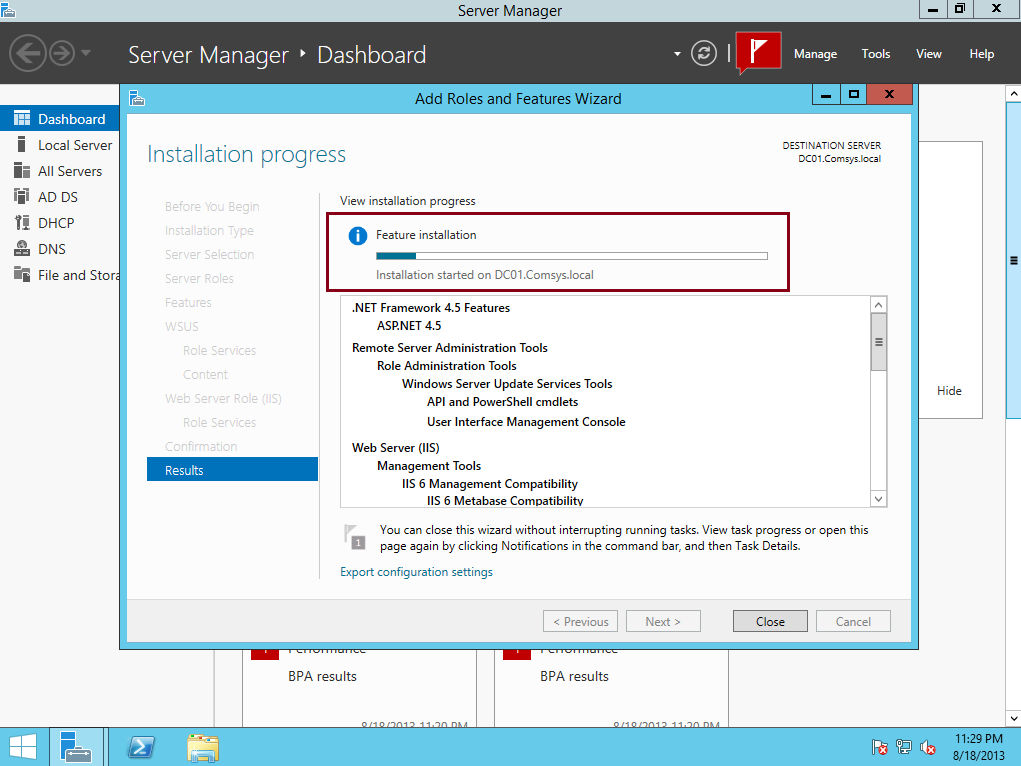
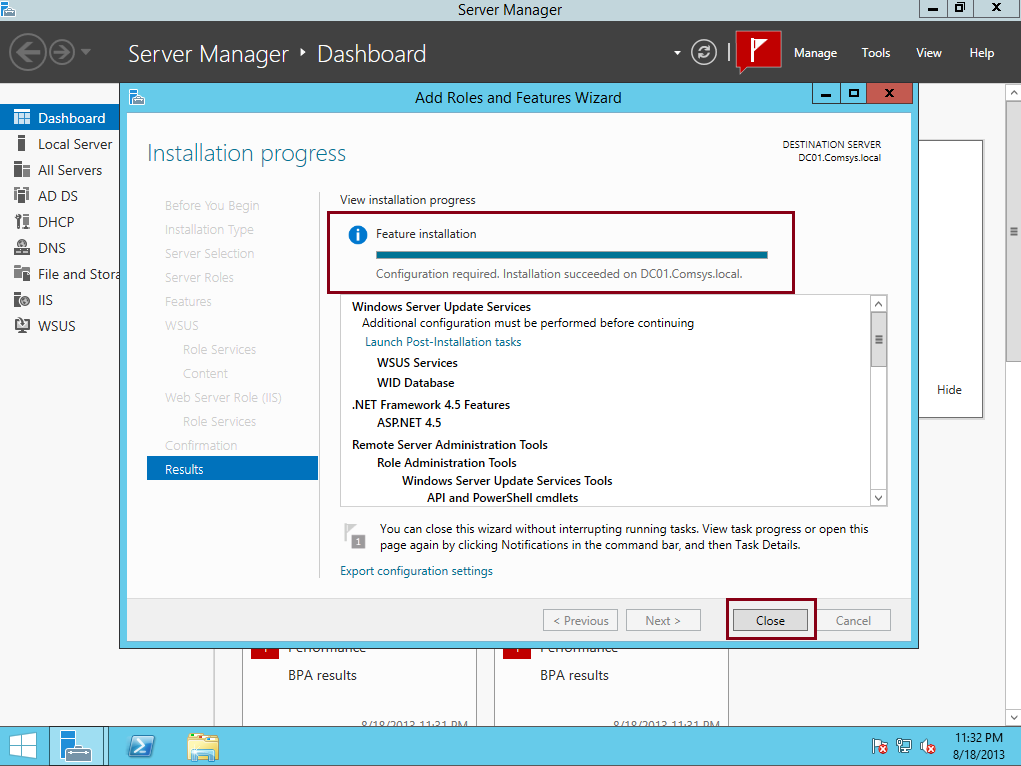
9 – When the installation completes, click Close…
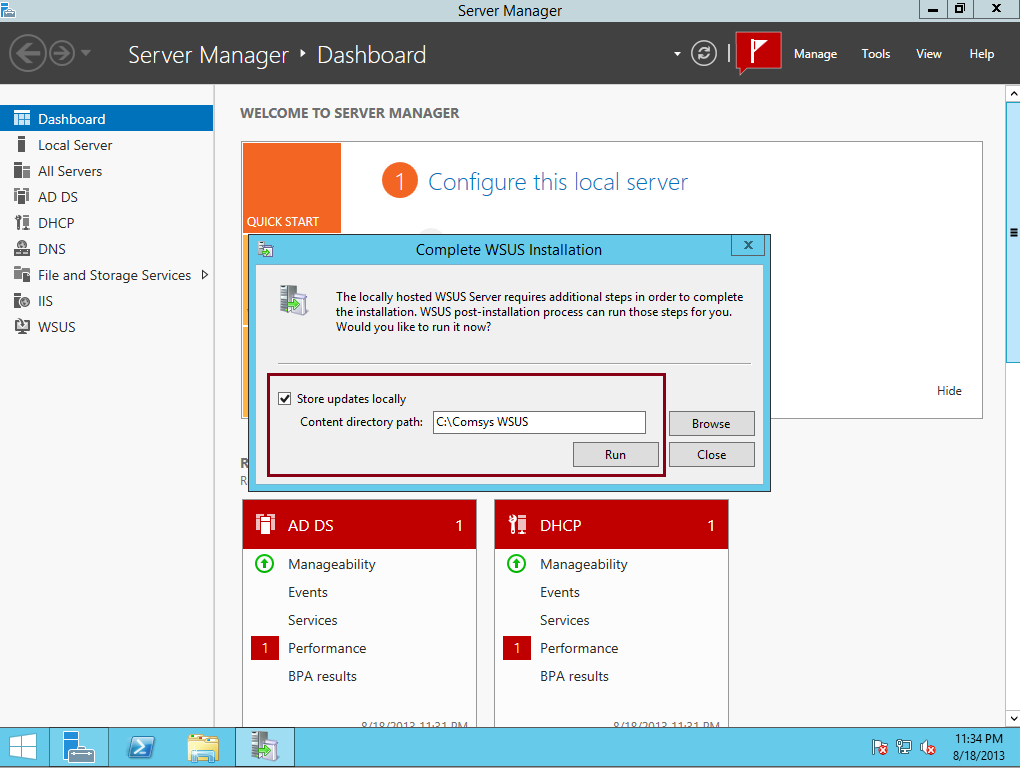
10 – Open Windows Server Update Services console, in the Complete WSUS Installation window, click Run, and wait for the task to complete then click Close…
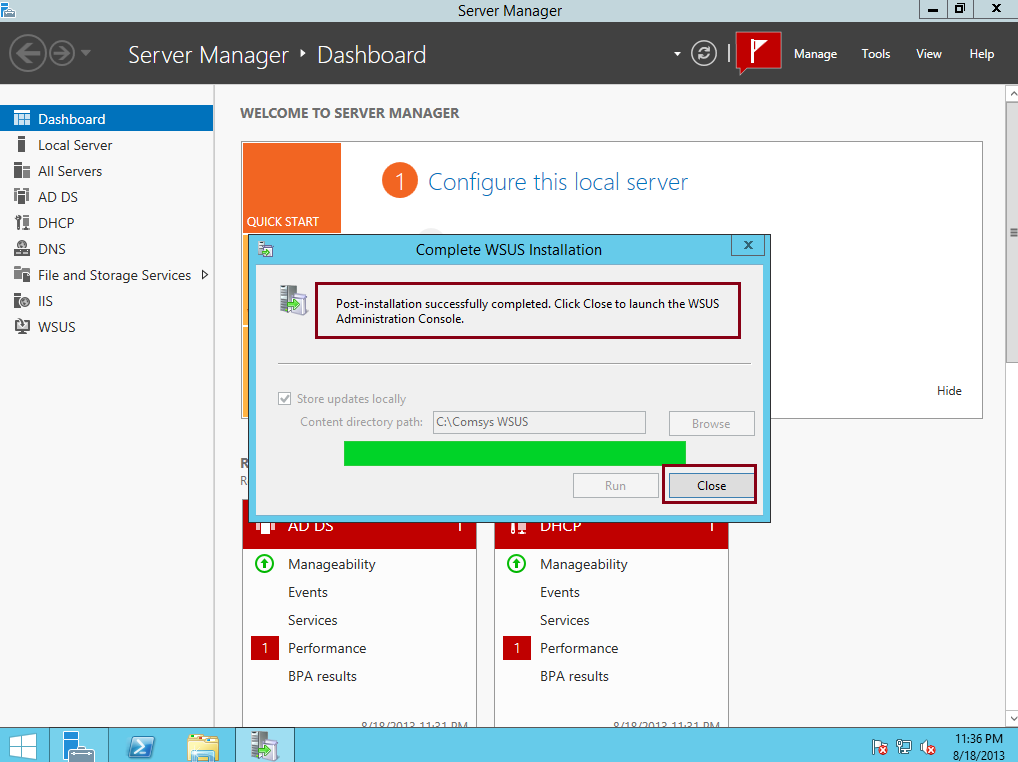
We had successfully installed WSUS on DC01.comsys.local now, our next task is to configure WSUS to synchronize with Windows Updates…
11 – In the Windows Server Update Services Configuration Wizard window, on the Before You Begin, click Next to proceed…

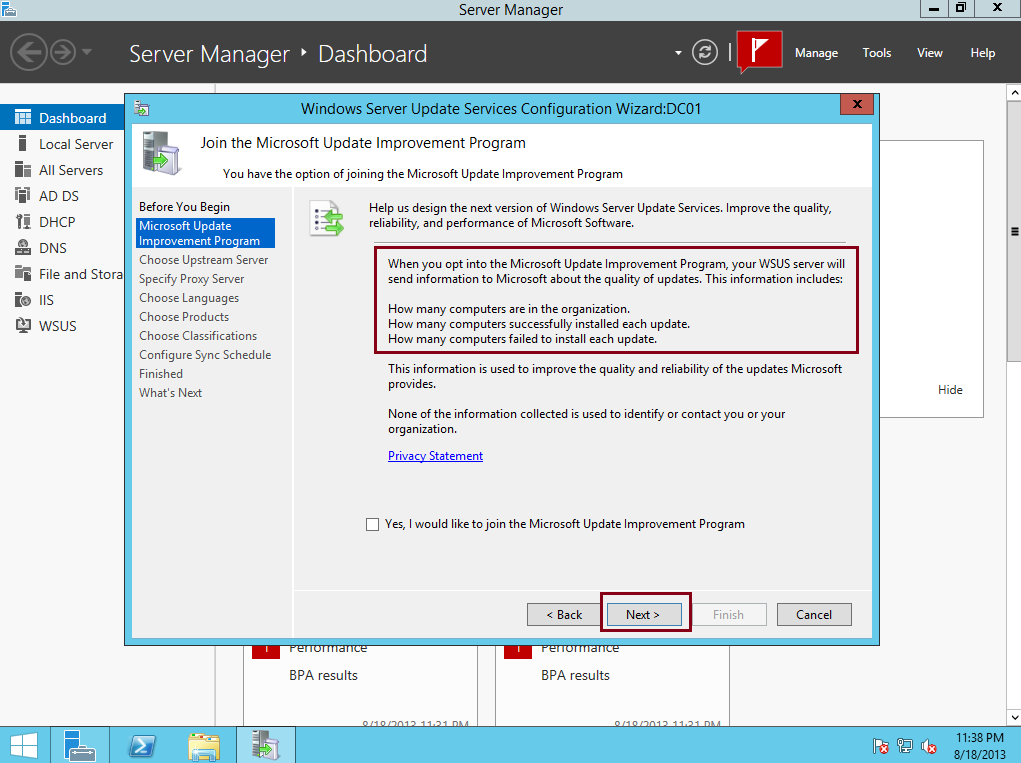
12 – On the Join the Microsoft Update Improvement Program, just click Next…
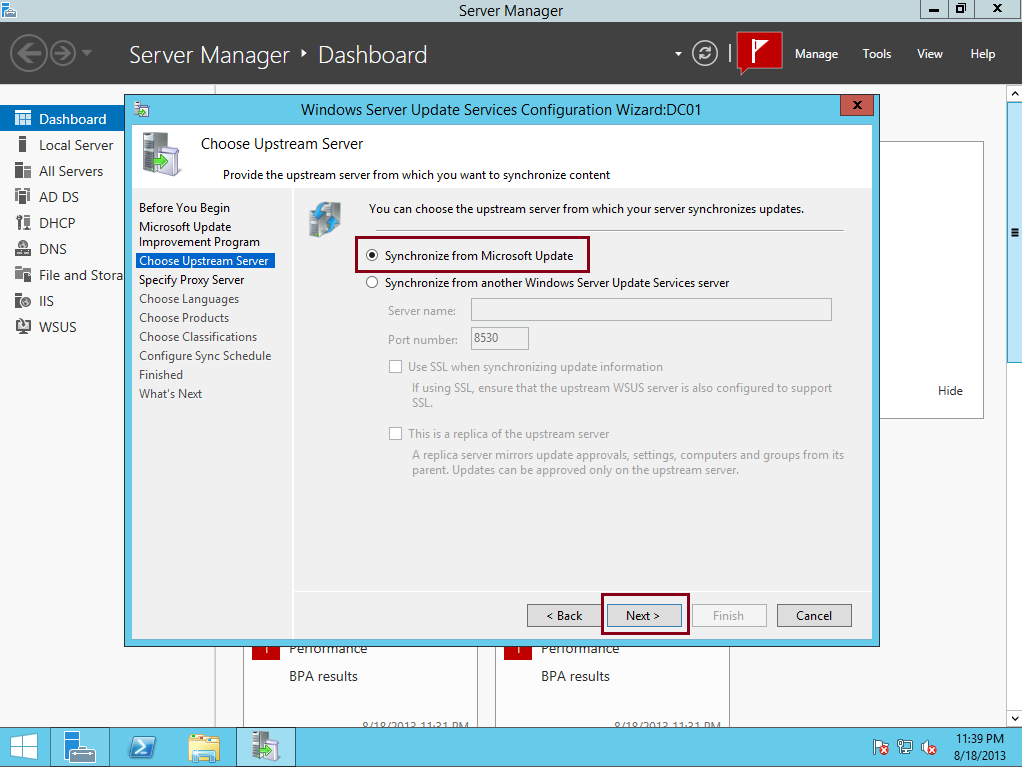
13 – On the Choose Upstream Server box, click the Synchronize from Microsoft Update option and then click Next…
14 – On the Specify Proxy Server box, click Next…

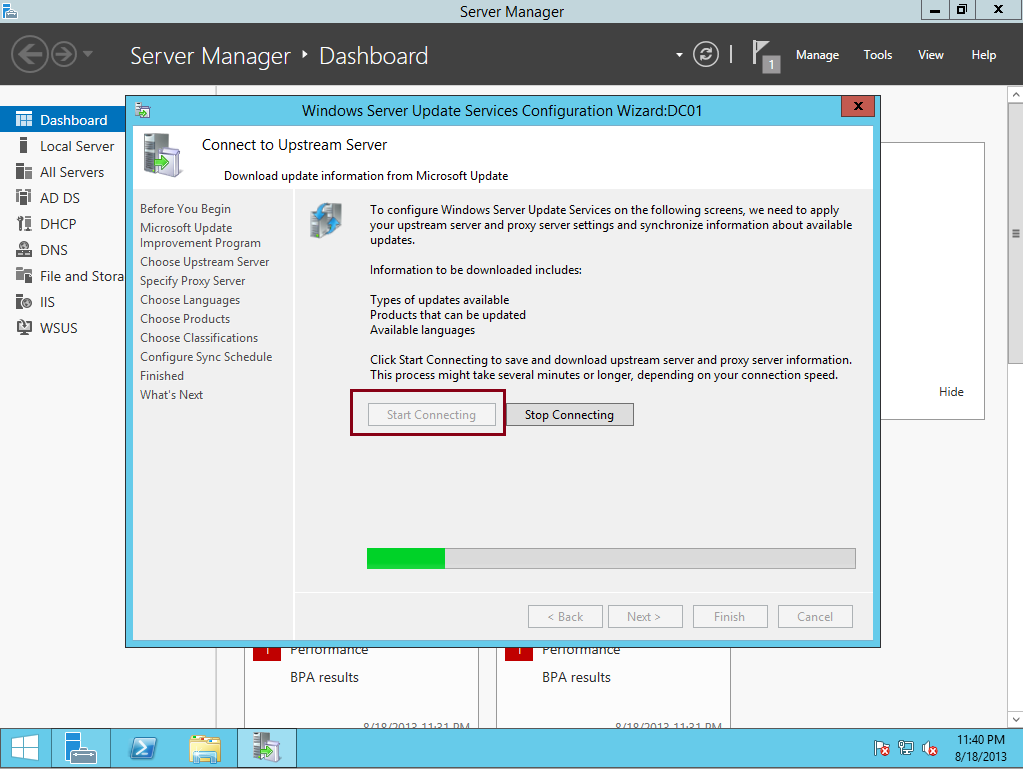
15 – On the Connect to Upstream Server box, click Start Connecting. Wait for the Windows Update to be applied, and then click Next…

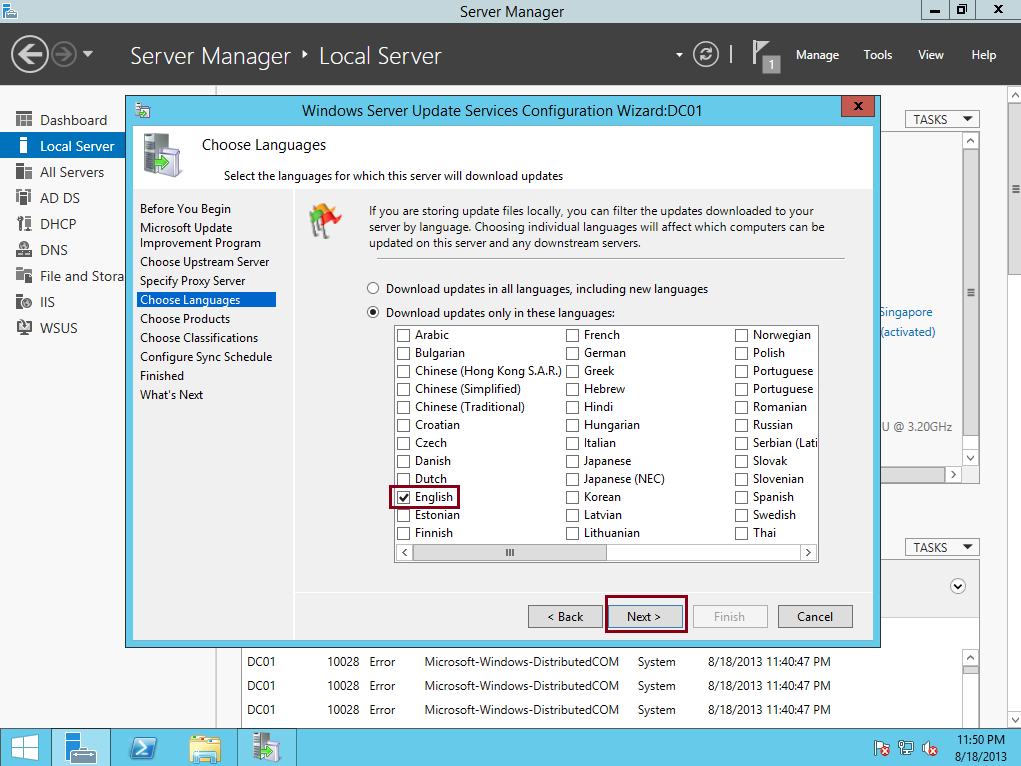
16 – On the Choose Languages box, click Next…
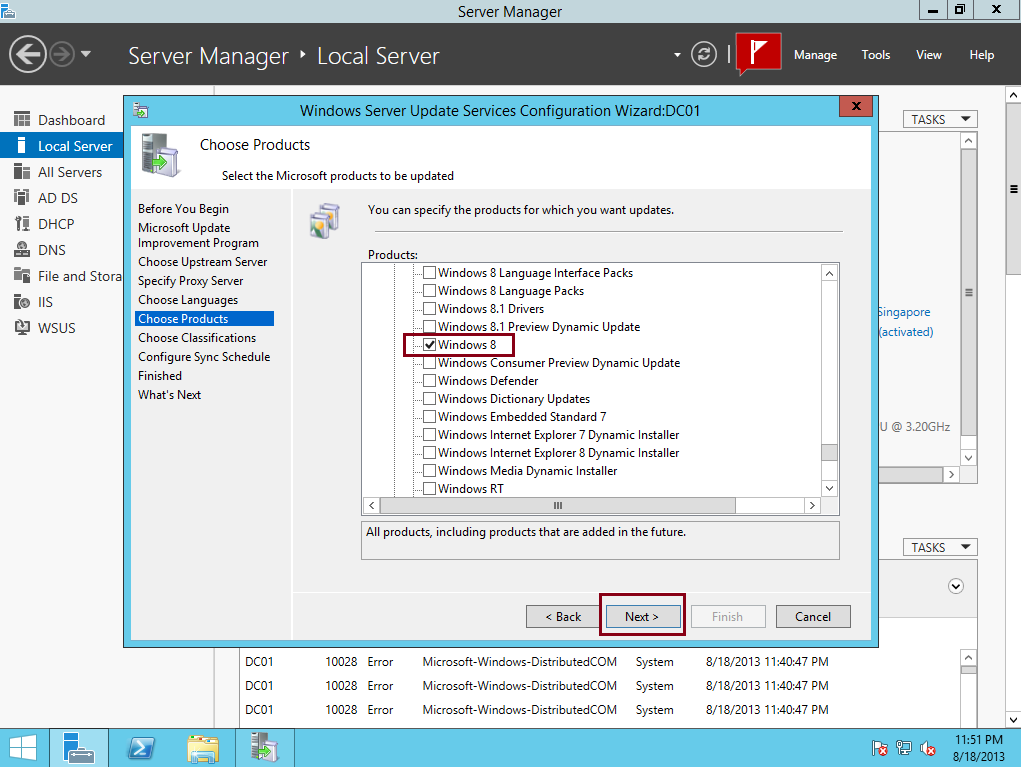
17 – On the Choose Products box, I choose Windows 8 and Windows Server 2012 R2 (you can use any Updates follow by you existing application), and click Next…
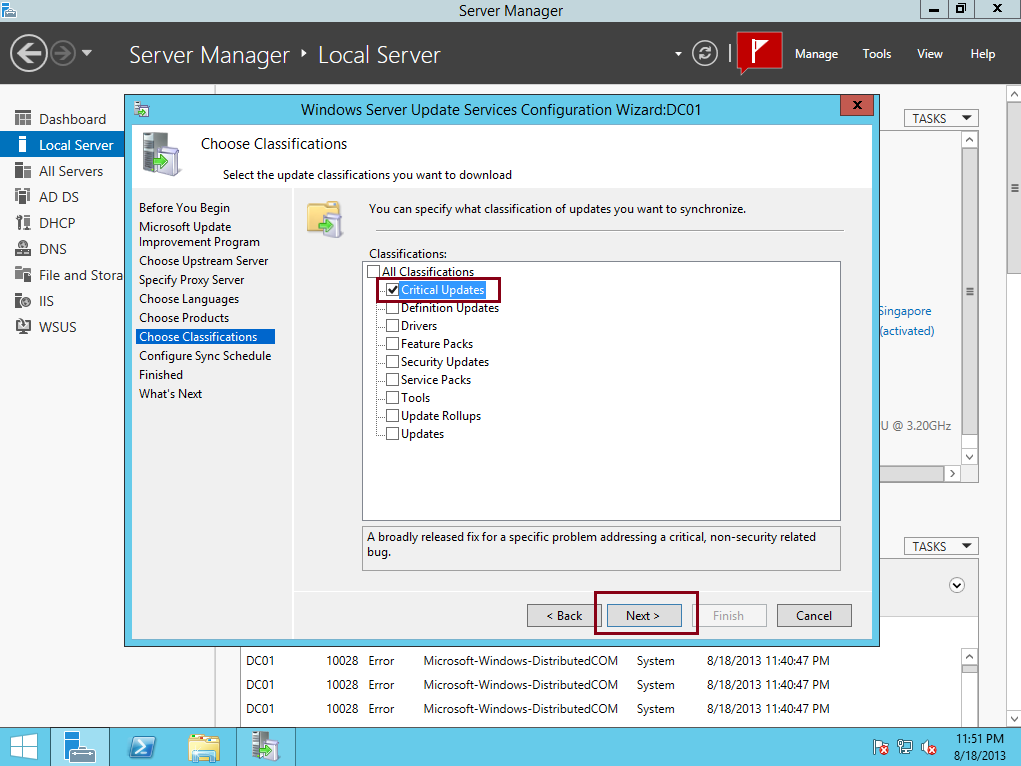
18 – On the Choose Classifications box, I choose Critical Updates (you can choose all updates classification if you require and your internet is fast) click Next…
19 – On the Set Sync Schedule box, I choose Synchronize manually, then click Next…

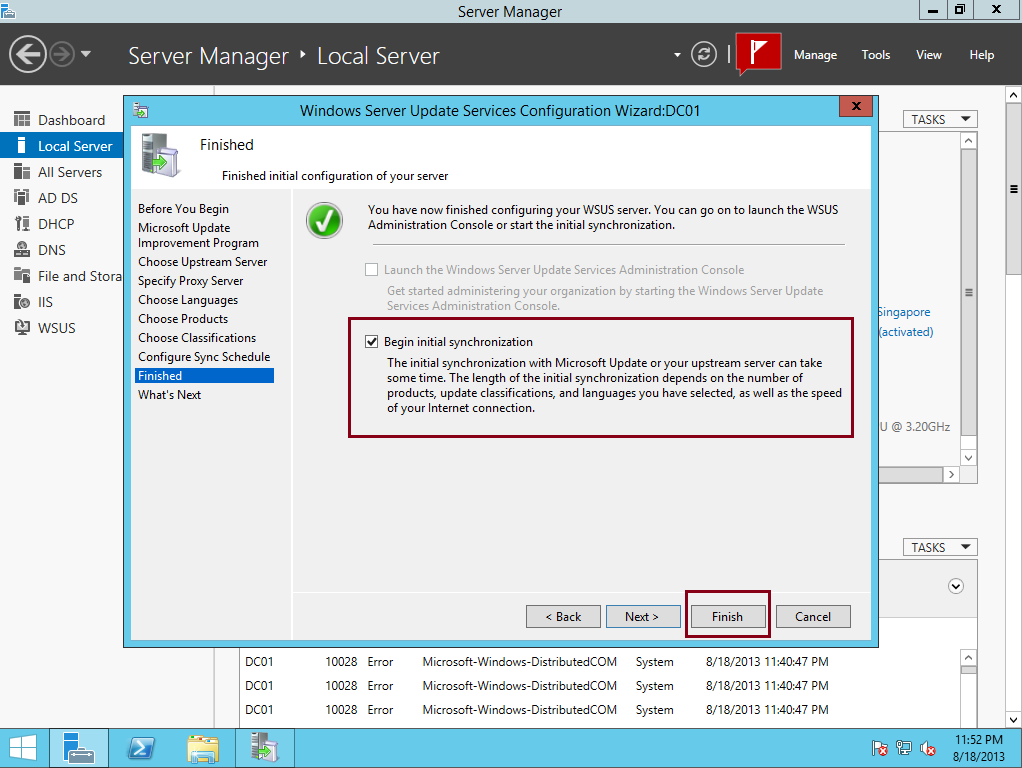
20 – On the Finished box, click the Begin initial synchronization option, and then click Finish…
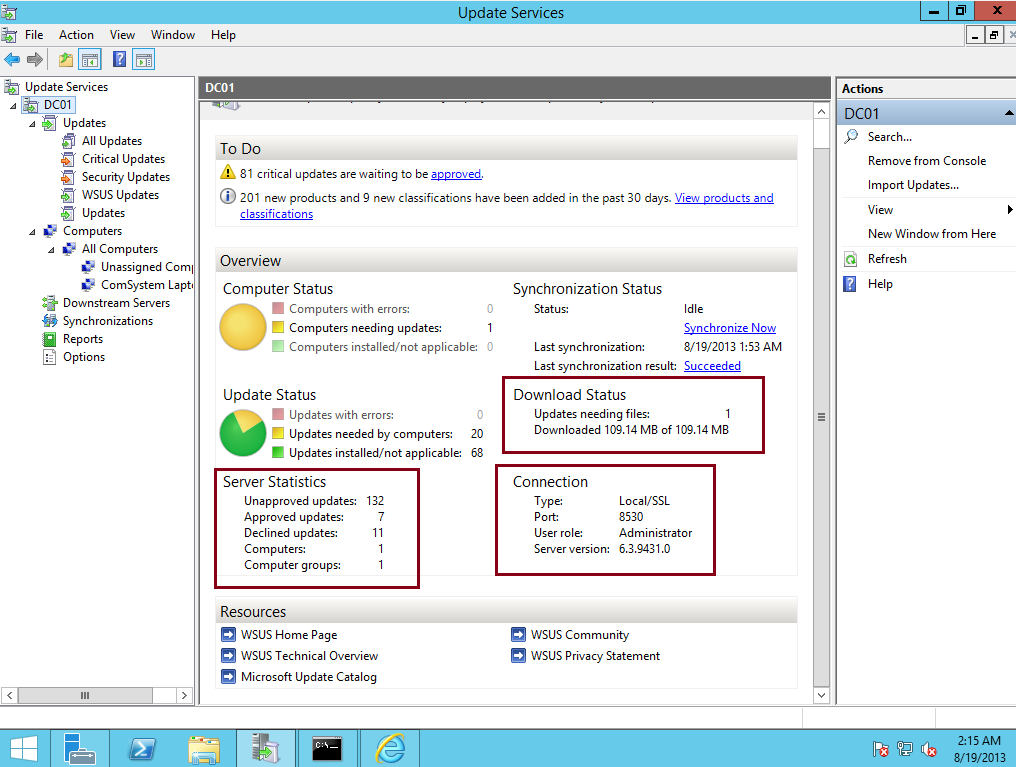
21 – In the Windows Server Update Services console, in the navigation pane, double-click DC01, and please spend few minutes to reviews what you had on the WSUS consoles and the information…
** If you notice in my WSUS Server, WSUS is synchronizing update information, this might take few minutes…
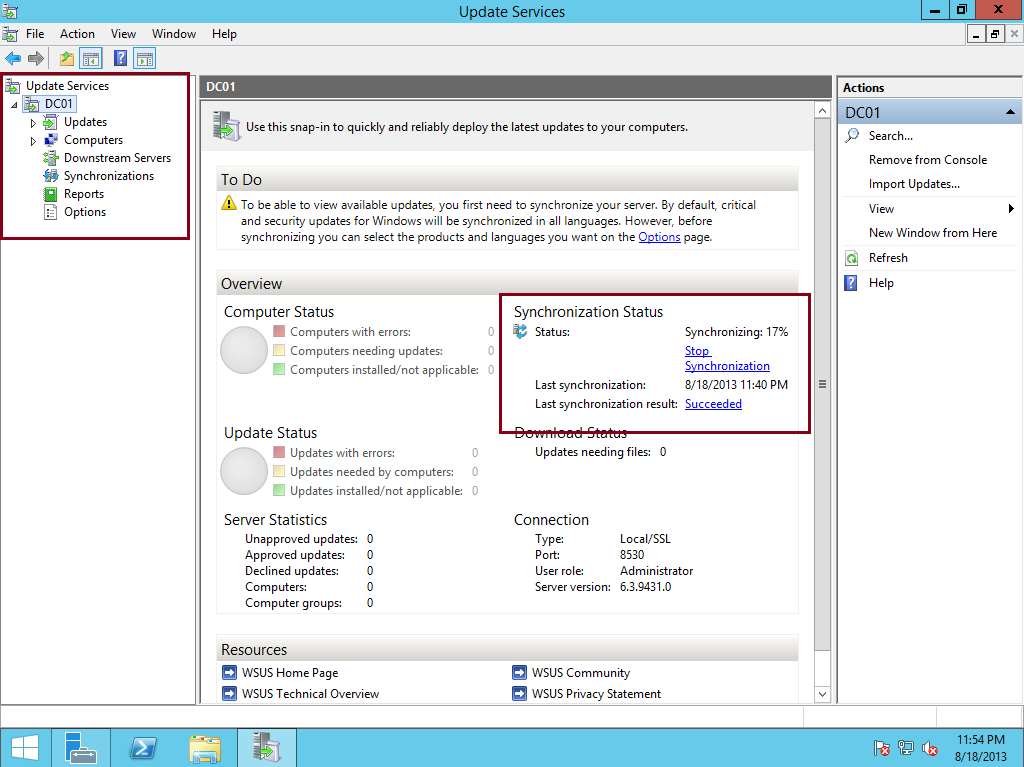
** If everything goes well, on the synchronization status you can see that Status is Idle and the Last Synchronization result: Succeeded…

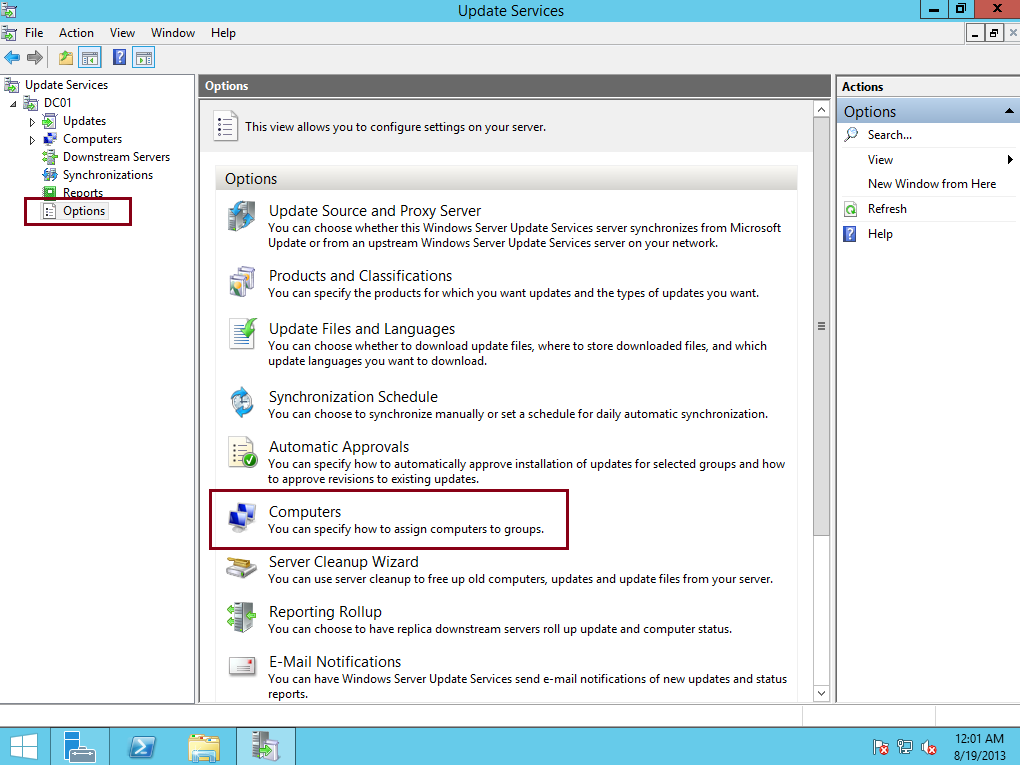
22 – Next, let’s add Computer Group to WSUS, this method is to make sure that any computer listed in the Computer Group will get the Updates from WSUS Server…
On the WSUS console, click Options and then double click Computers…
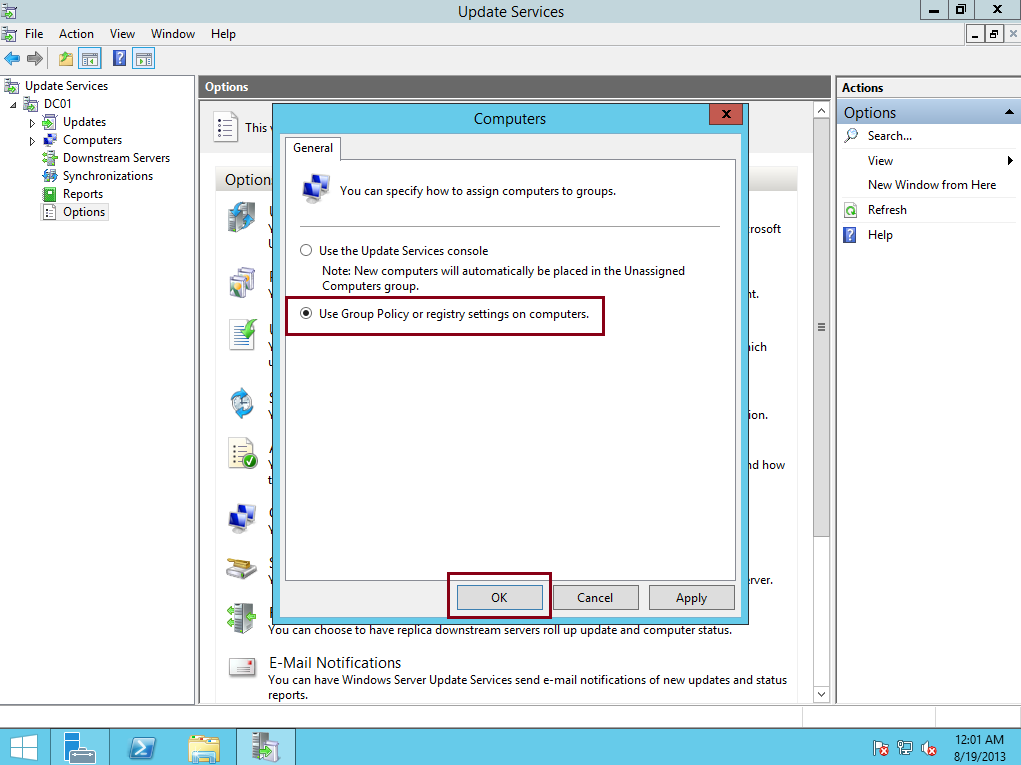
23 – In the Computers dialog box, select Use Group Policy or registry settings on computers then click OK…
** I choose Use Group Policy because I wanted all my Clients getting windows updates by GPO…
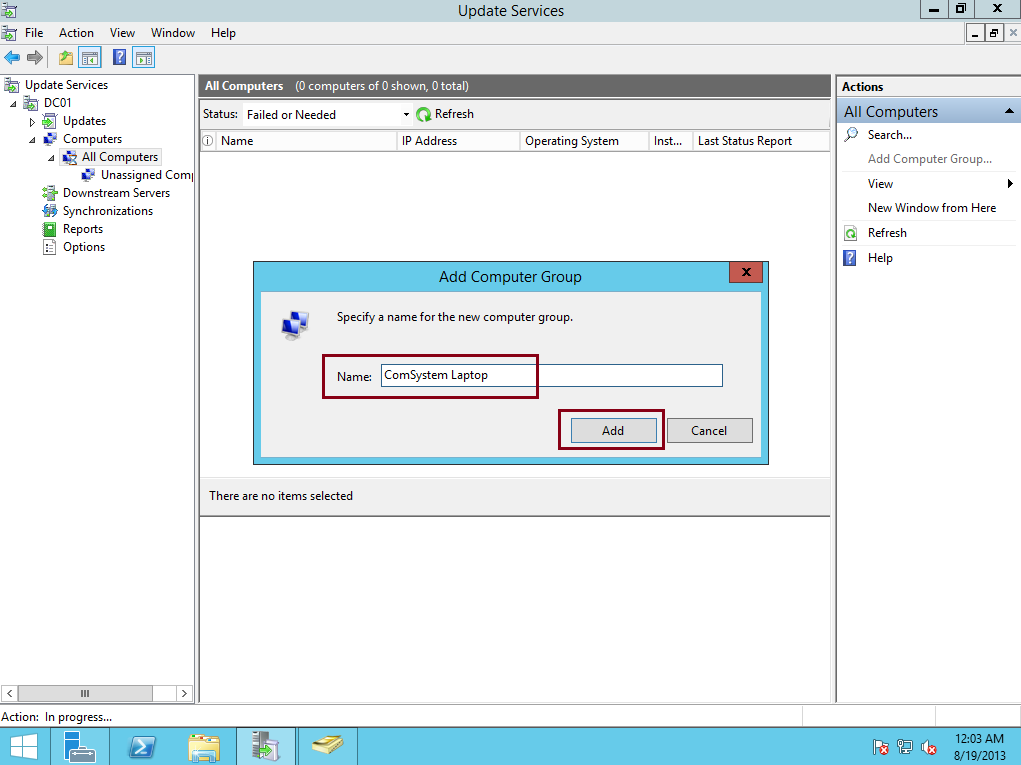
24 – Next, click All Computers, and then, in the Actions pane, click Add Computer Group…

25 – In the Add Computer Group dialog box, in the Name text box, type Comsystem Laptop, and then click Add…
26 – Once you successfully add a New Computer Group to WSUS, now we need to create new GPO and configure it so that all our clients will be effected by this GPO to get the Windows Updates…
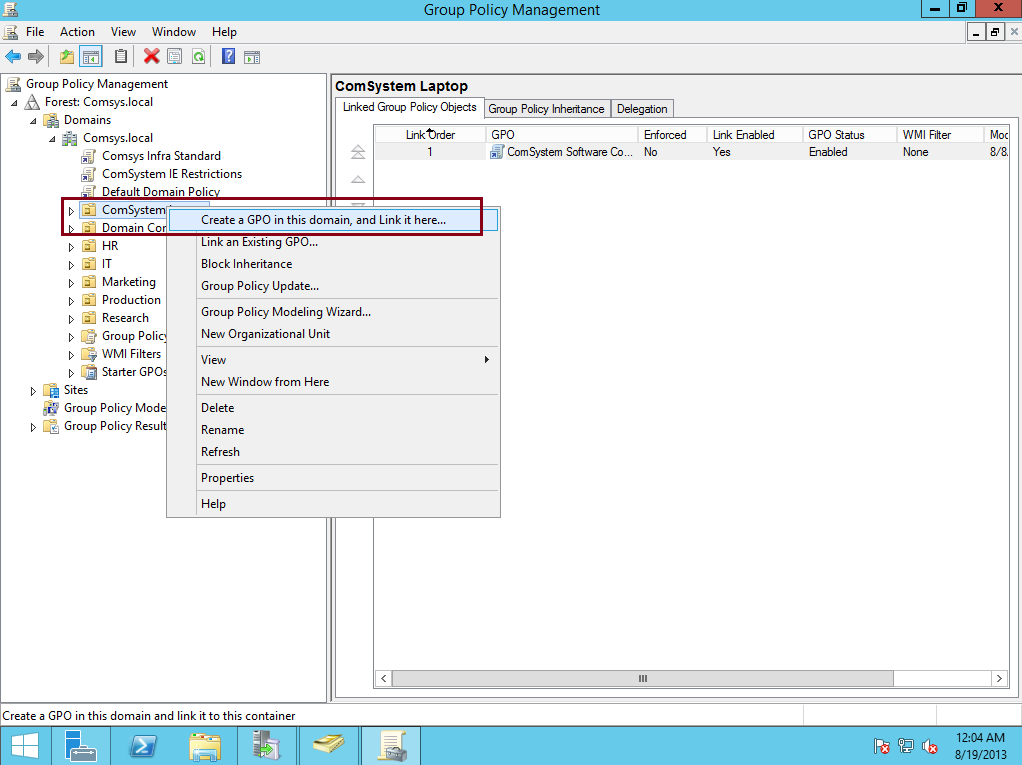
** On the Domain Server, open Group Policy Management, right click Comsystem Laptop and then click Create a GPO in this domain, and Link it here…
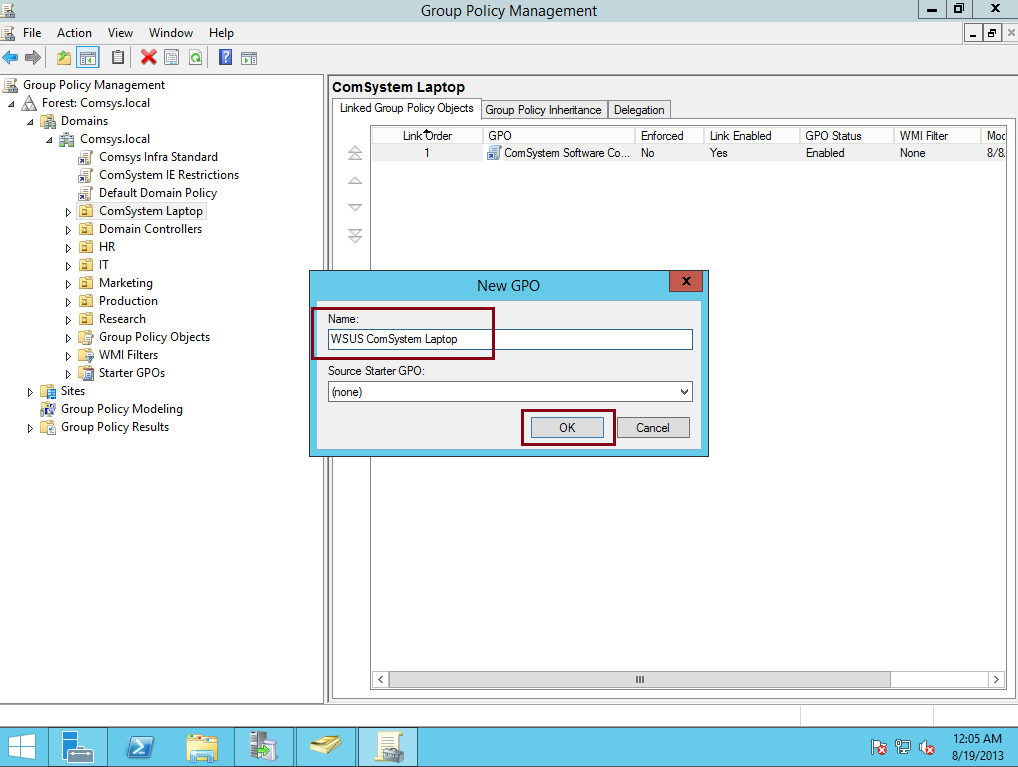
27 – In the New GPO dialog box, type WSUS Comsystem Laptop ,and then click OK…
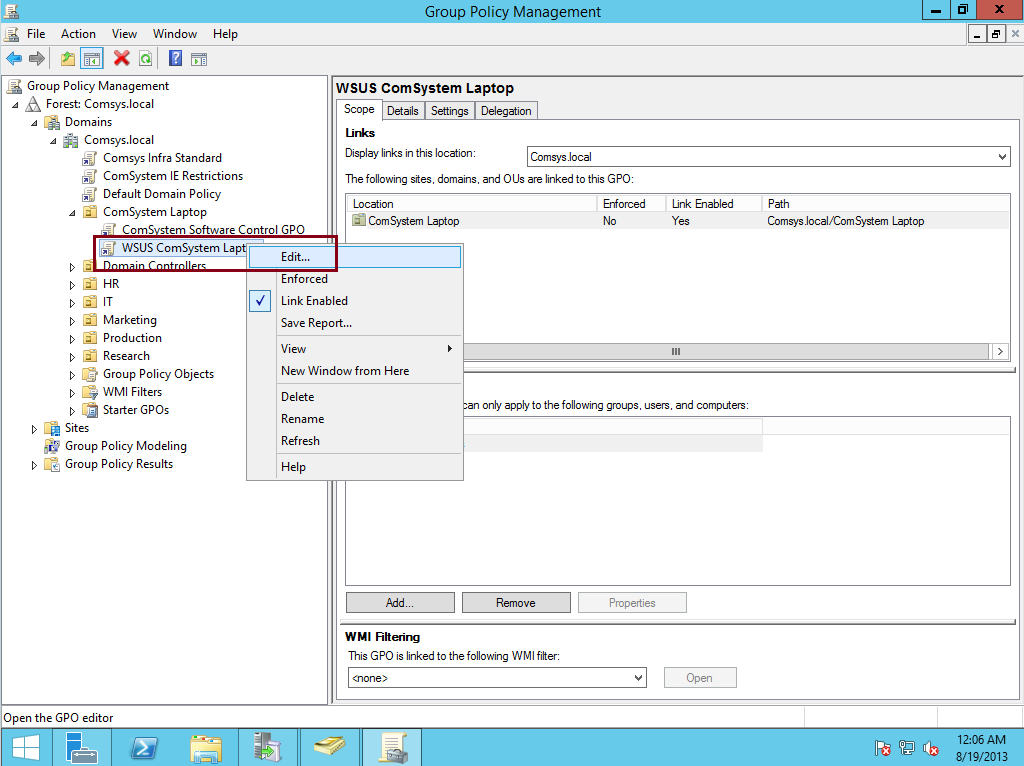
28 – Next, right-click WSUS Comsystem Laptop, and then click Edit…
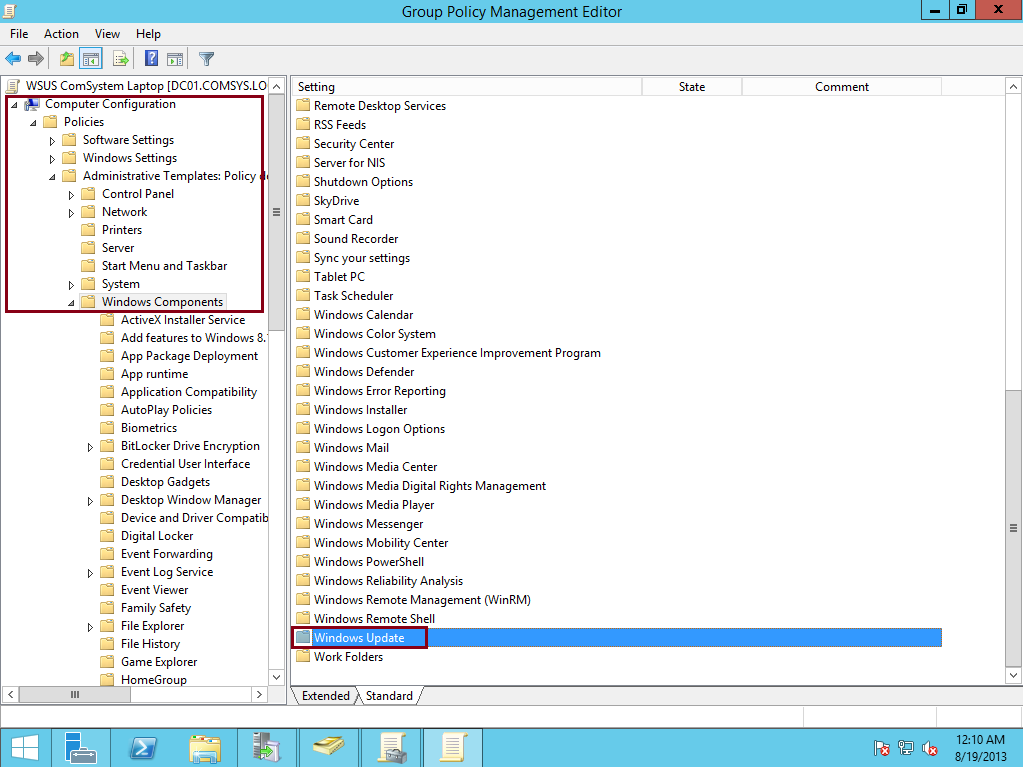
29 – Next, in the Group Policy Management Editor, under Computer Configuration, double-click Policies, double-click Administrative Templates, double-click Windows Components, and then click Windows Update…
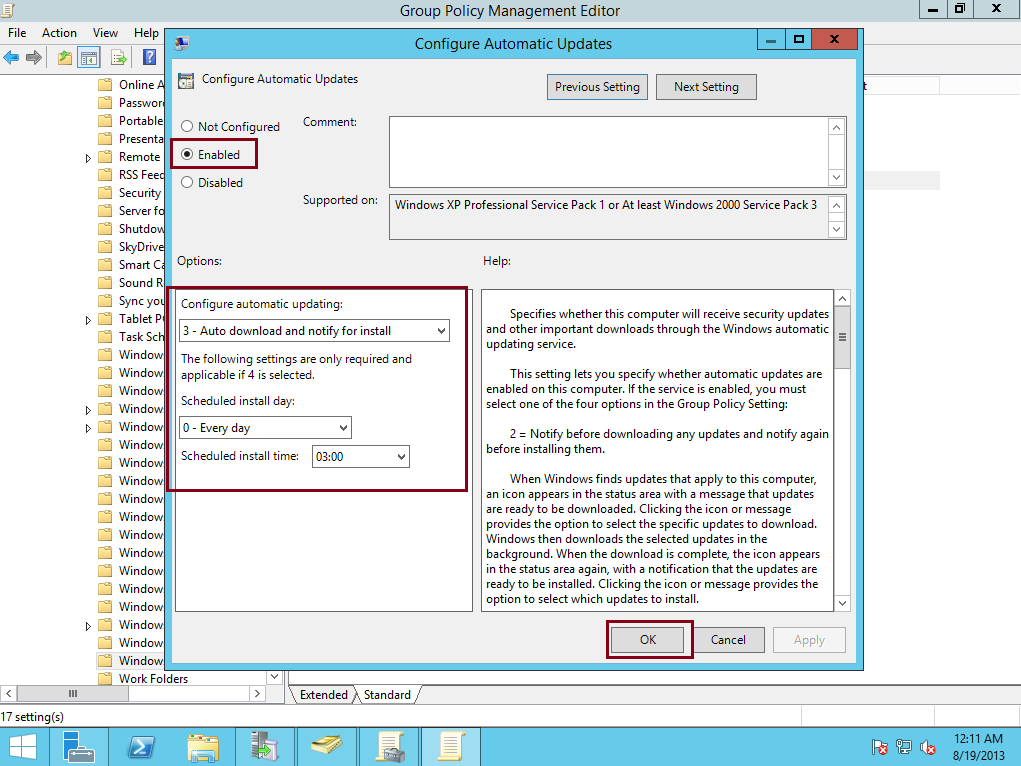
30 – Next, in the Setting pane, double-click Configure Automatic Updates, and then click the Enabled option, under Options, in the Configure automatic updating field, click and select 3 – Auto download and notify for install, and then click OK…
31 – In the Setting pane, double-click Specify intranet Microsoft update service location, and then click the Enabled option, then in the Set the intranet update service for detecting updates and the Set the intranet statistics server text boxes, type http://dc01.comsys.local:8530, and then click OK…

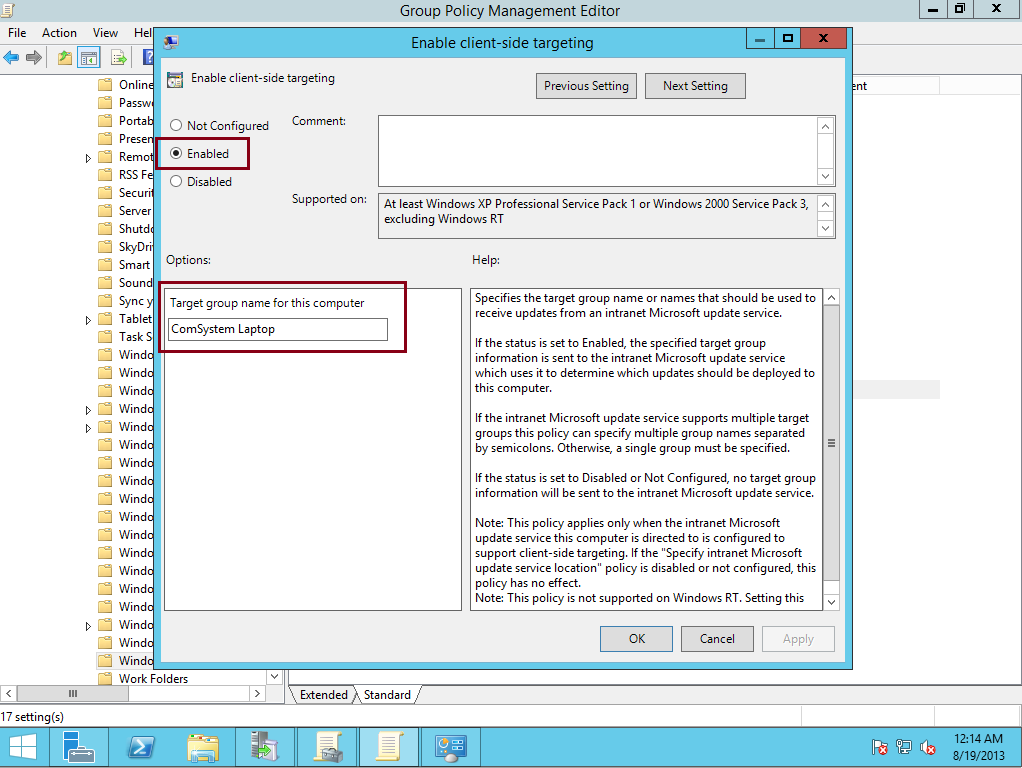
32 – In the Setting pane, double click Enable client-side targeting, in the Enable client-side targeting dialog box, click the Enabled option, in the Target group name for this computer text box, type Comsystem Laptop, and then click OK…
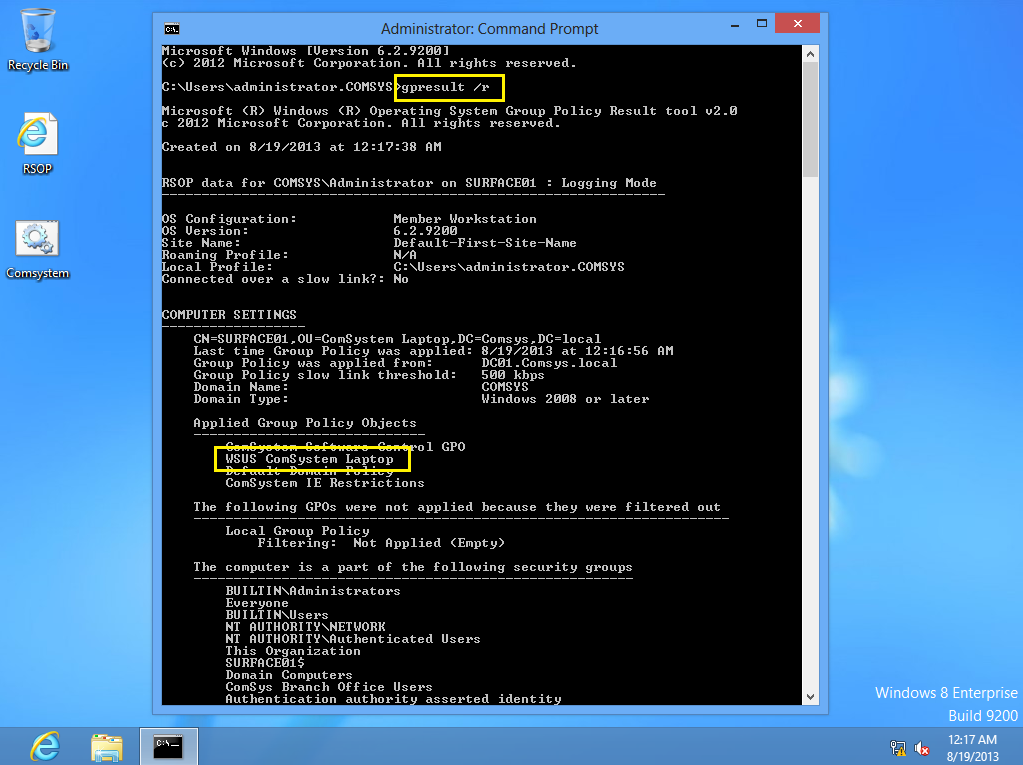
33 – Next, let’s log in to our client PC as domain administrator and verify that our client is receiving the GPO by typing gpresult /r in the command prompt, In the output of the command, confirm that, under COMPUTER SETTINGS, WSUS Comsystem Laptop is listed under Applied Group Policy Objects…
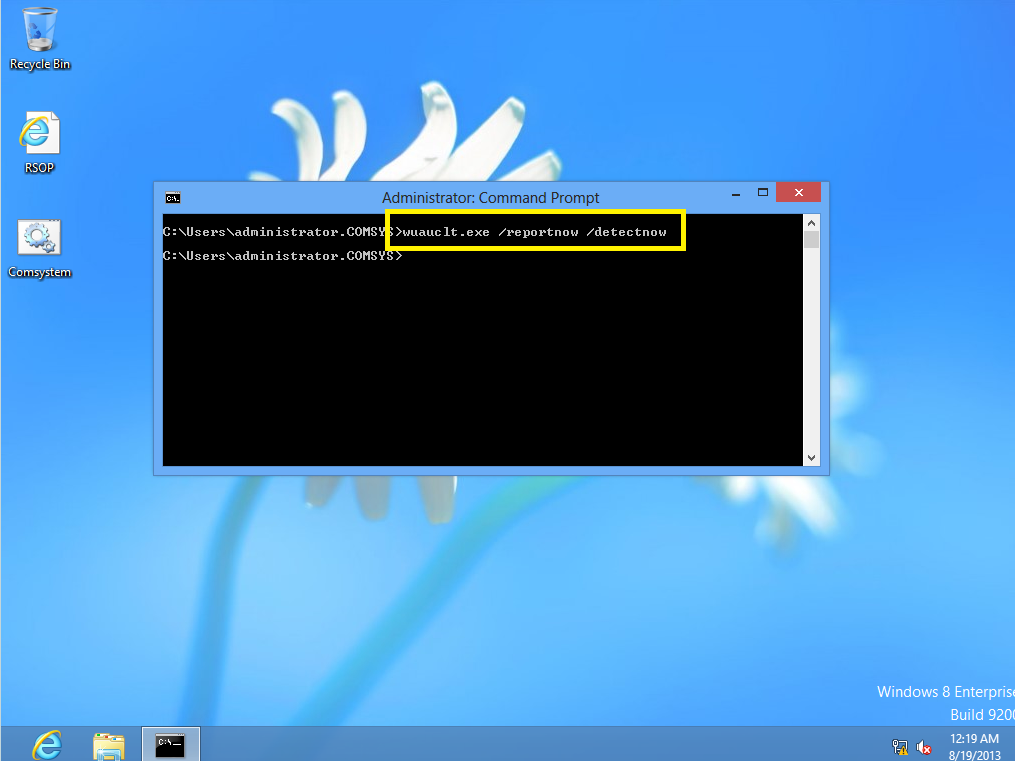
34 – Next, we need to Initialize the Windows Update by typing Wuauclt.exe /reportnow /detectnow in the cmd…
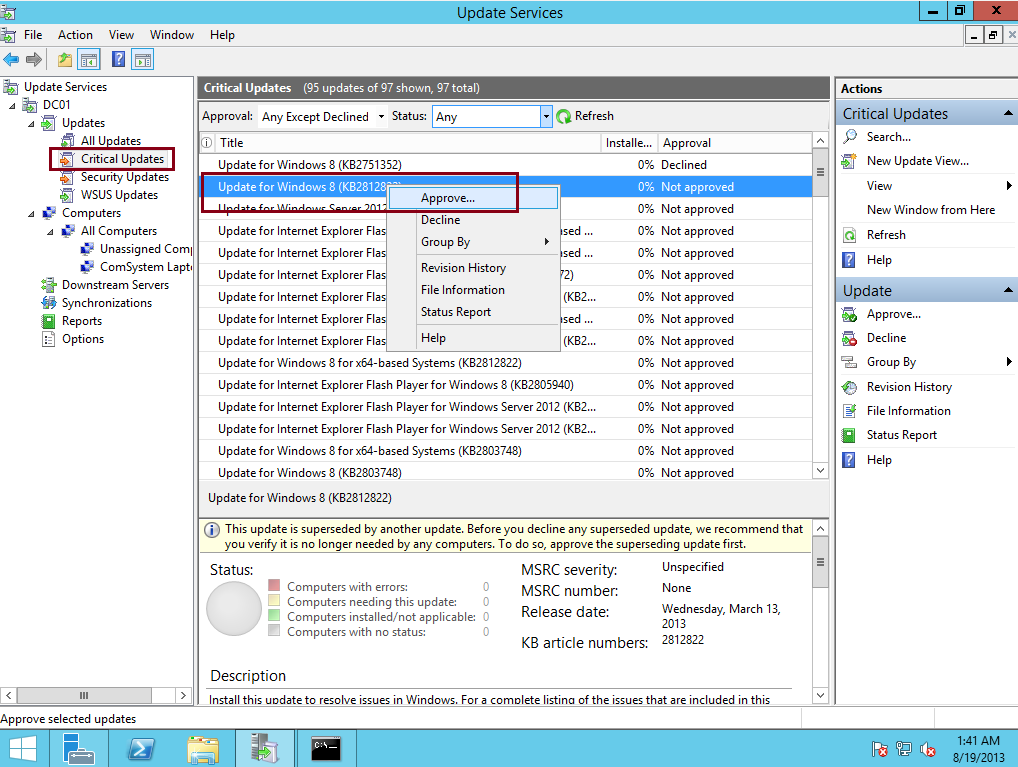
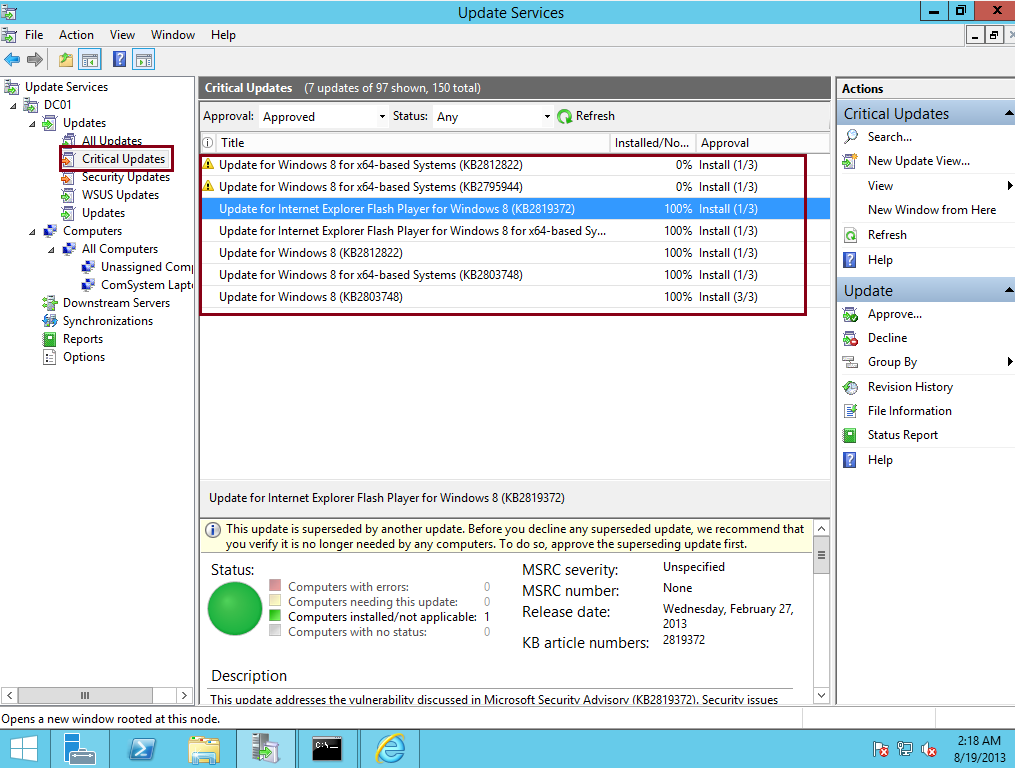
35 – Next, we need to Approve and at the same time deploy an Update to our client PC…
in WSUS console, under Updates, click Critical Updates, right click any updates you prefer for your client PC and then click Approve…
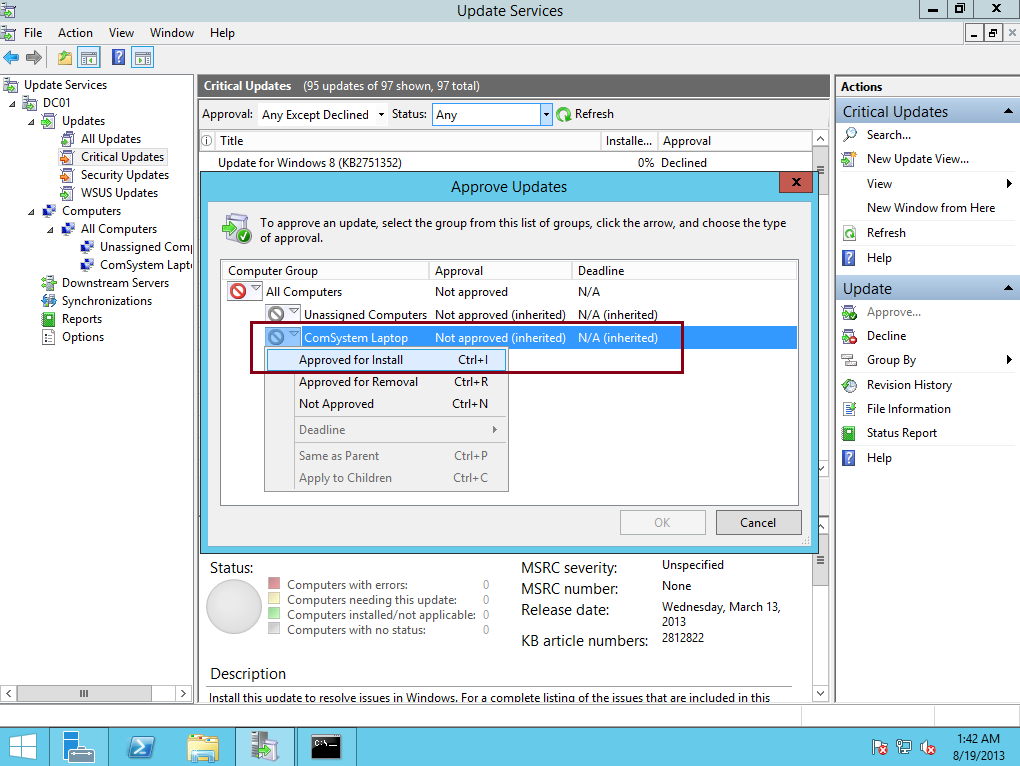
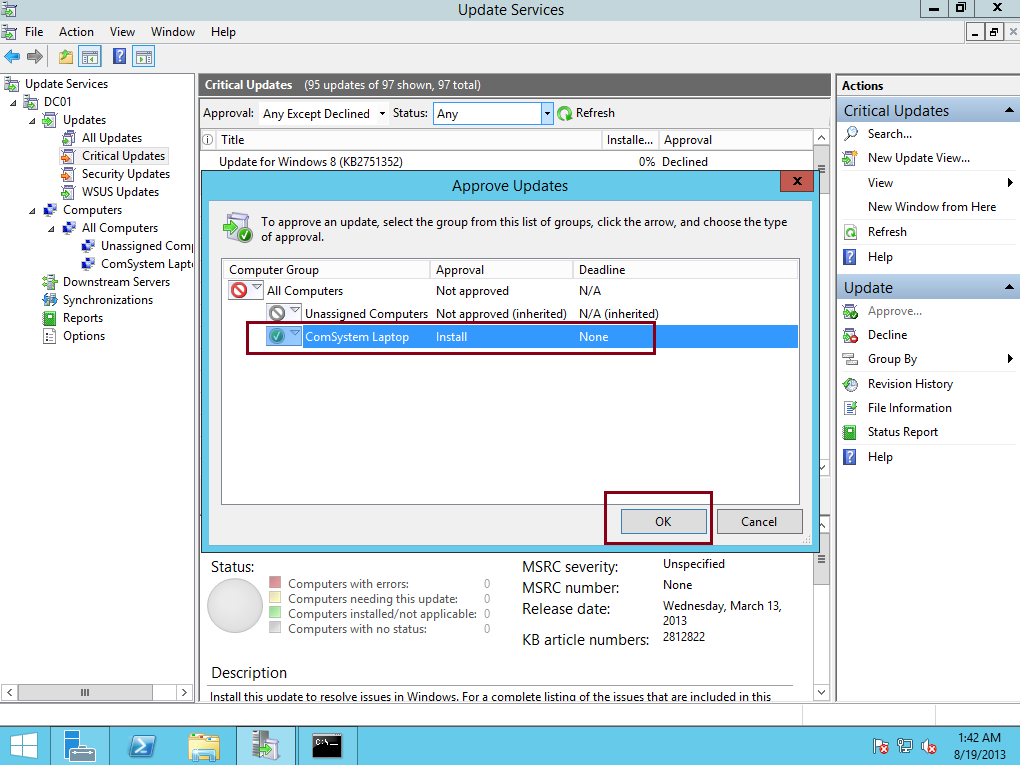
36 – In the Approve Updates window, in the Comsystem Laptop drop-down list box, select Approved for Install…
37 – Next, Click OK and then click Close…

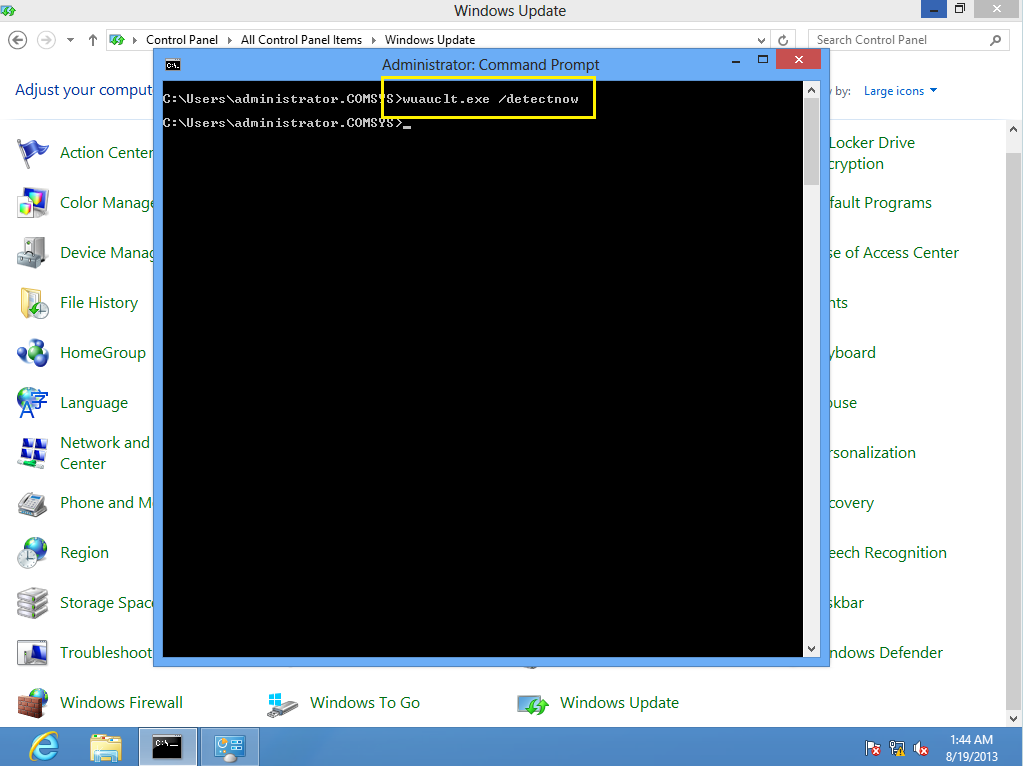
38 – Now, to deploy the selected updates, on the Client PC, in the cmd type Wuauclt.exe /detectnow…
39 – before you confirm the client can receive the update from the WSUS Server, return to WSUS Server and the on the WSUS console, on the Download Status, verify that the necessary / selected updates is finish downloading…
40 – Next, Click Critical Updates, an the right panes, verify that few updates is stated 100%…
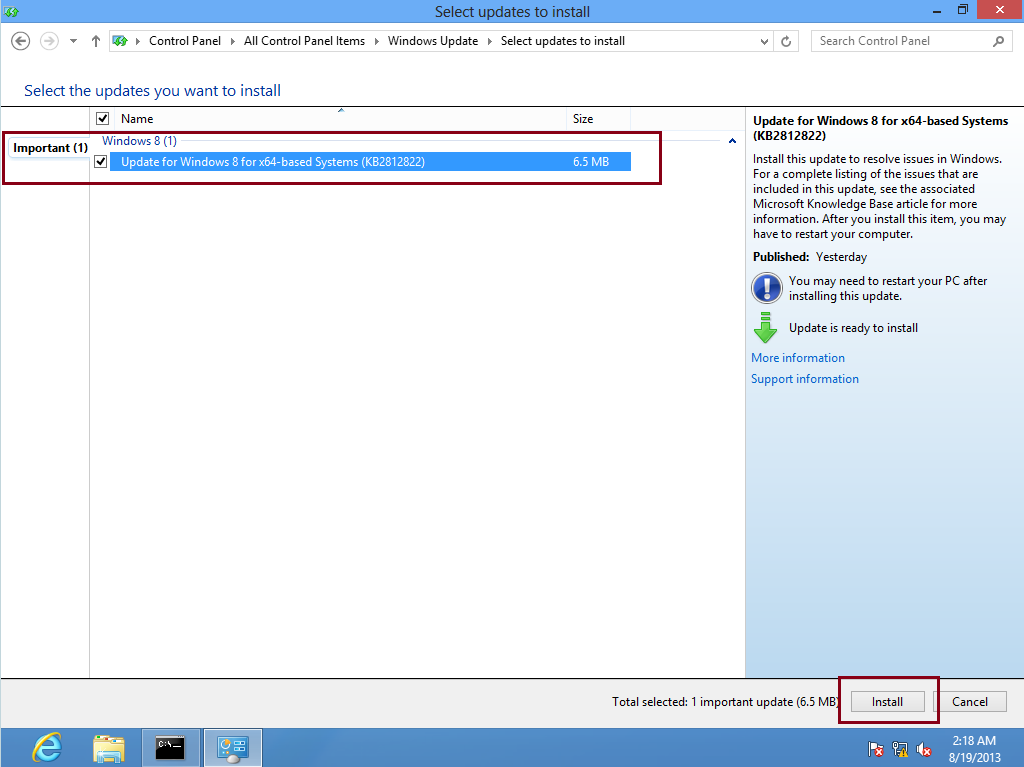
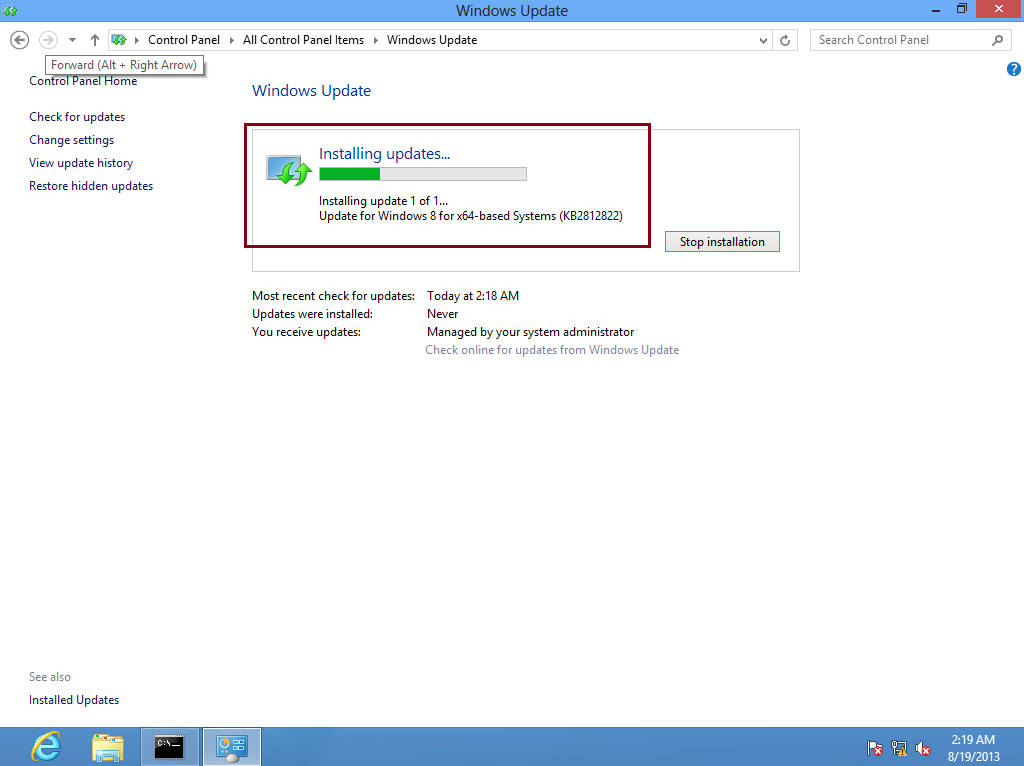
41 – Now return to Client PC and open Windows Update from Control Panel, you should notice update available for your client PC and you can proceed with installation…
We done for now, please wait for my next post.. 🙂


Excellent article, very helpful.
In step #23 You said ” I choose Use Group Policy because I wanted all my Clients getting windows updates by GPO…”
Note that this setting only affects how you sort computers into groups, not whether or not computers get updates from WSUS. For a large network, you might use Group Policy to automatically sort WSUS clients into groups like “Active Directory”, “SQL Servers”, “File Servers”, “Chicago Desktops”, etc.
Otherwise, great article! 🙂 It looks like MIcrosoft has made this very simple in 2012R2, compared to older versions of WSUS.
Hello,
I followed the instruction except for the gpo since i still nee to test if wsus is working but upon testing i receive errror 800b00001. i tried it in windows 7, windows 8.1..
Thanks in advance for your help.
Regards,
Bea
Thanks for the great article. I was having problems with my installation until I changed my virtual server’s memory setting to not be dynamic in Hyper-V. After that, it worked just like you describe.
Reblogged this on davidstamen.com.
Very nice article.
Is this possible to get a PDF ? Nice article
Email me..thx
Very good article, but I would suggest two changes: Microsoft strongly recommends against installing WSUS on the domain controller. Second, I found that the reporting mechanism requires .NET Framework 3.5 installed. I suggest recommending it be installed at step 2.
Very Good and Useful Article…Thank You
Loved it
Yes! Finally something about Installing and Configuring Windows Server 2012.
Great article and worked like a charm
Thank you
Very good and clear article.
Thanks for explaining it in so depth.
many thanks~
Thank you 🙂
Thank you. This helped me a lot. 🙂
Reblogged this on yongcao88.
Very good article and very good and clear explanations. B R A V O !!!